Technical Direction for Compositing
〰️
Technical Direction for Compositing 〰️
Project 3: Magic Box + Projections
Week 3
Update #2
Update #1
This is the final version I submitted for this project, there is still a lot I need to fix like the depth of field on the interior could match better with the plate, my lighting could a lot be more accurate, and the textures in the interior need more work and detail.
I also got some critique in class to add red light spill to the ground when the box opens and I also want to try to fix that as well.
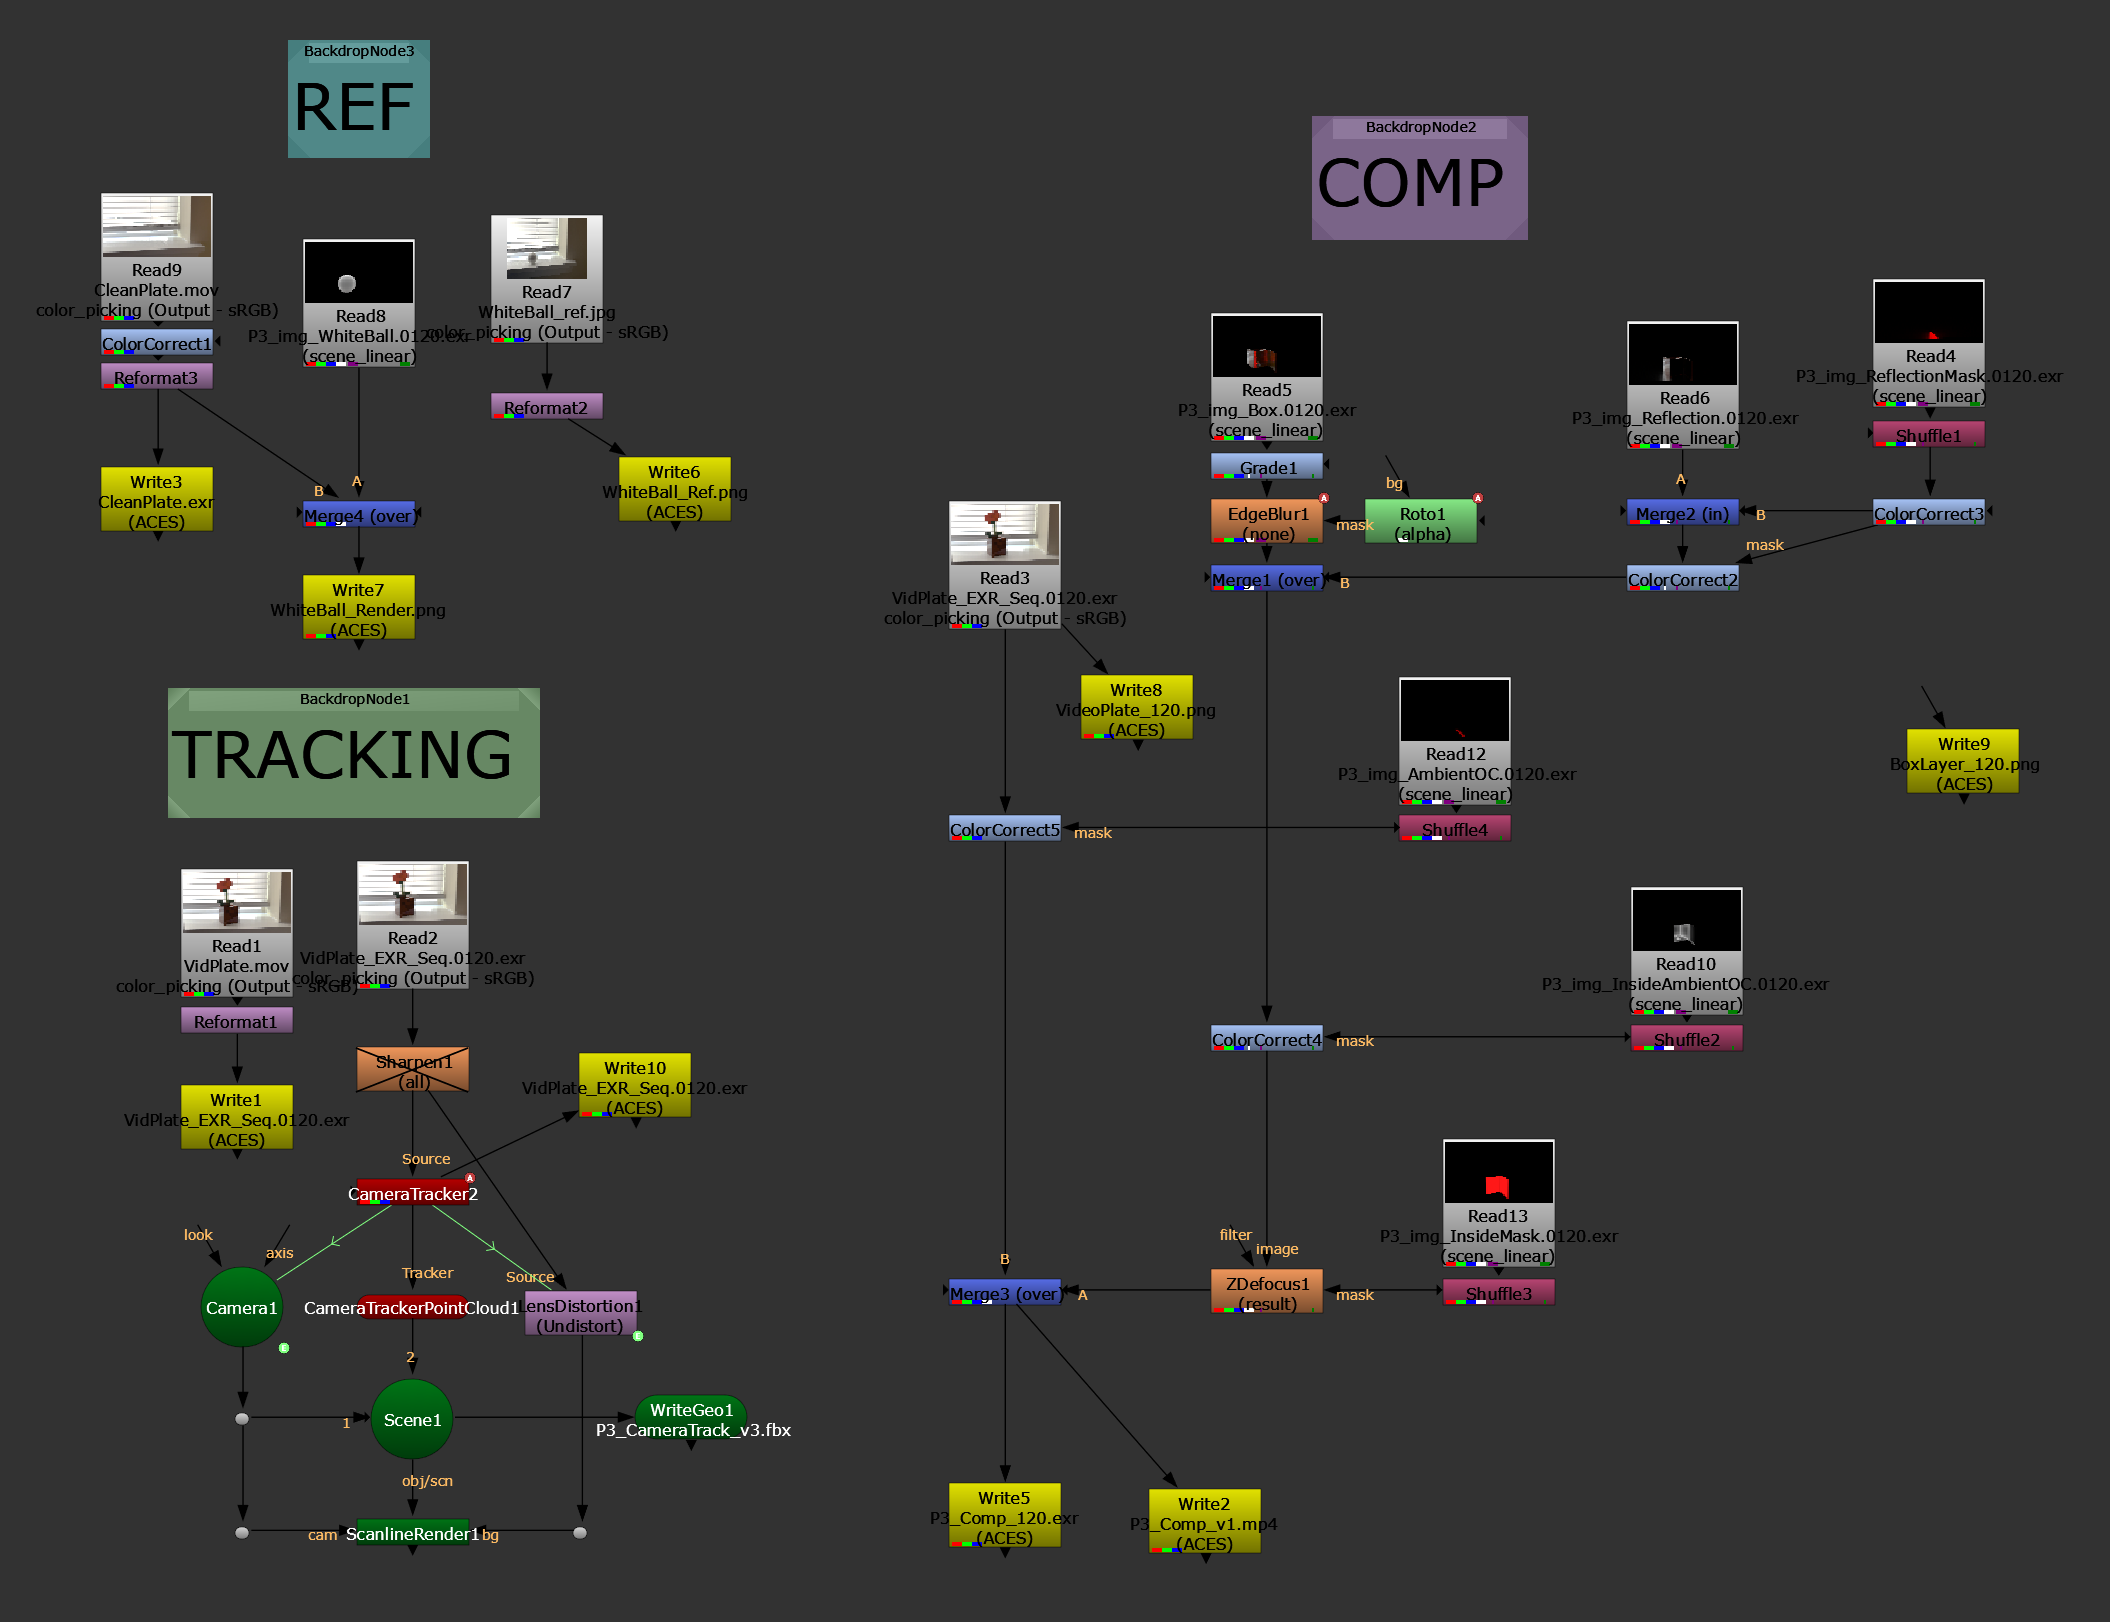
Nuke Node Tree
These two versions are between receiving some critique in class. On the left is my first rough slap comp of my interior, and on the right I applied critiques like making the red light brighter and have if affect the box interior more, and to match the real box material roughness on the inside.
Week 2
Update #2
Here is my most recent progress, I have the camera tracked and the projected texture on the box working with the opening animation. Now I need to create the CG Interior and set up all the different render layers I need.
Update #1
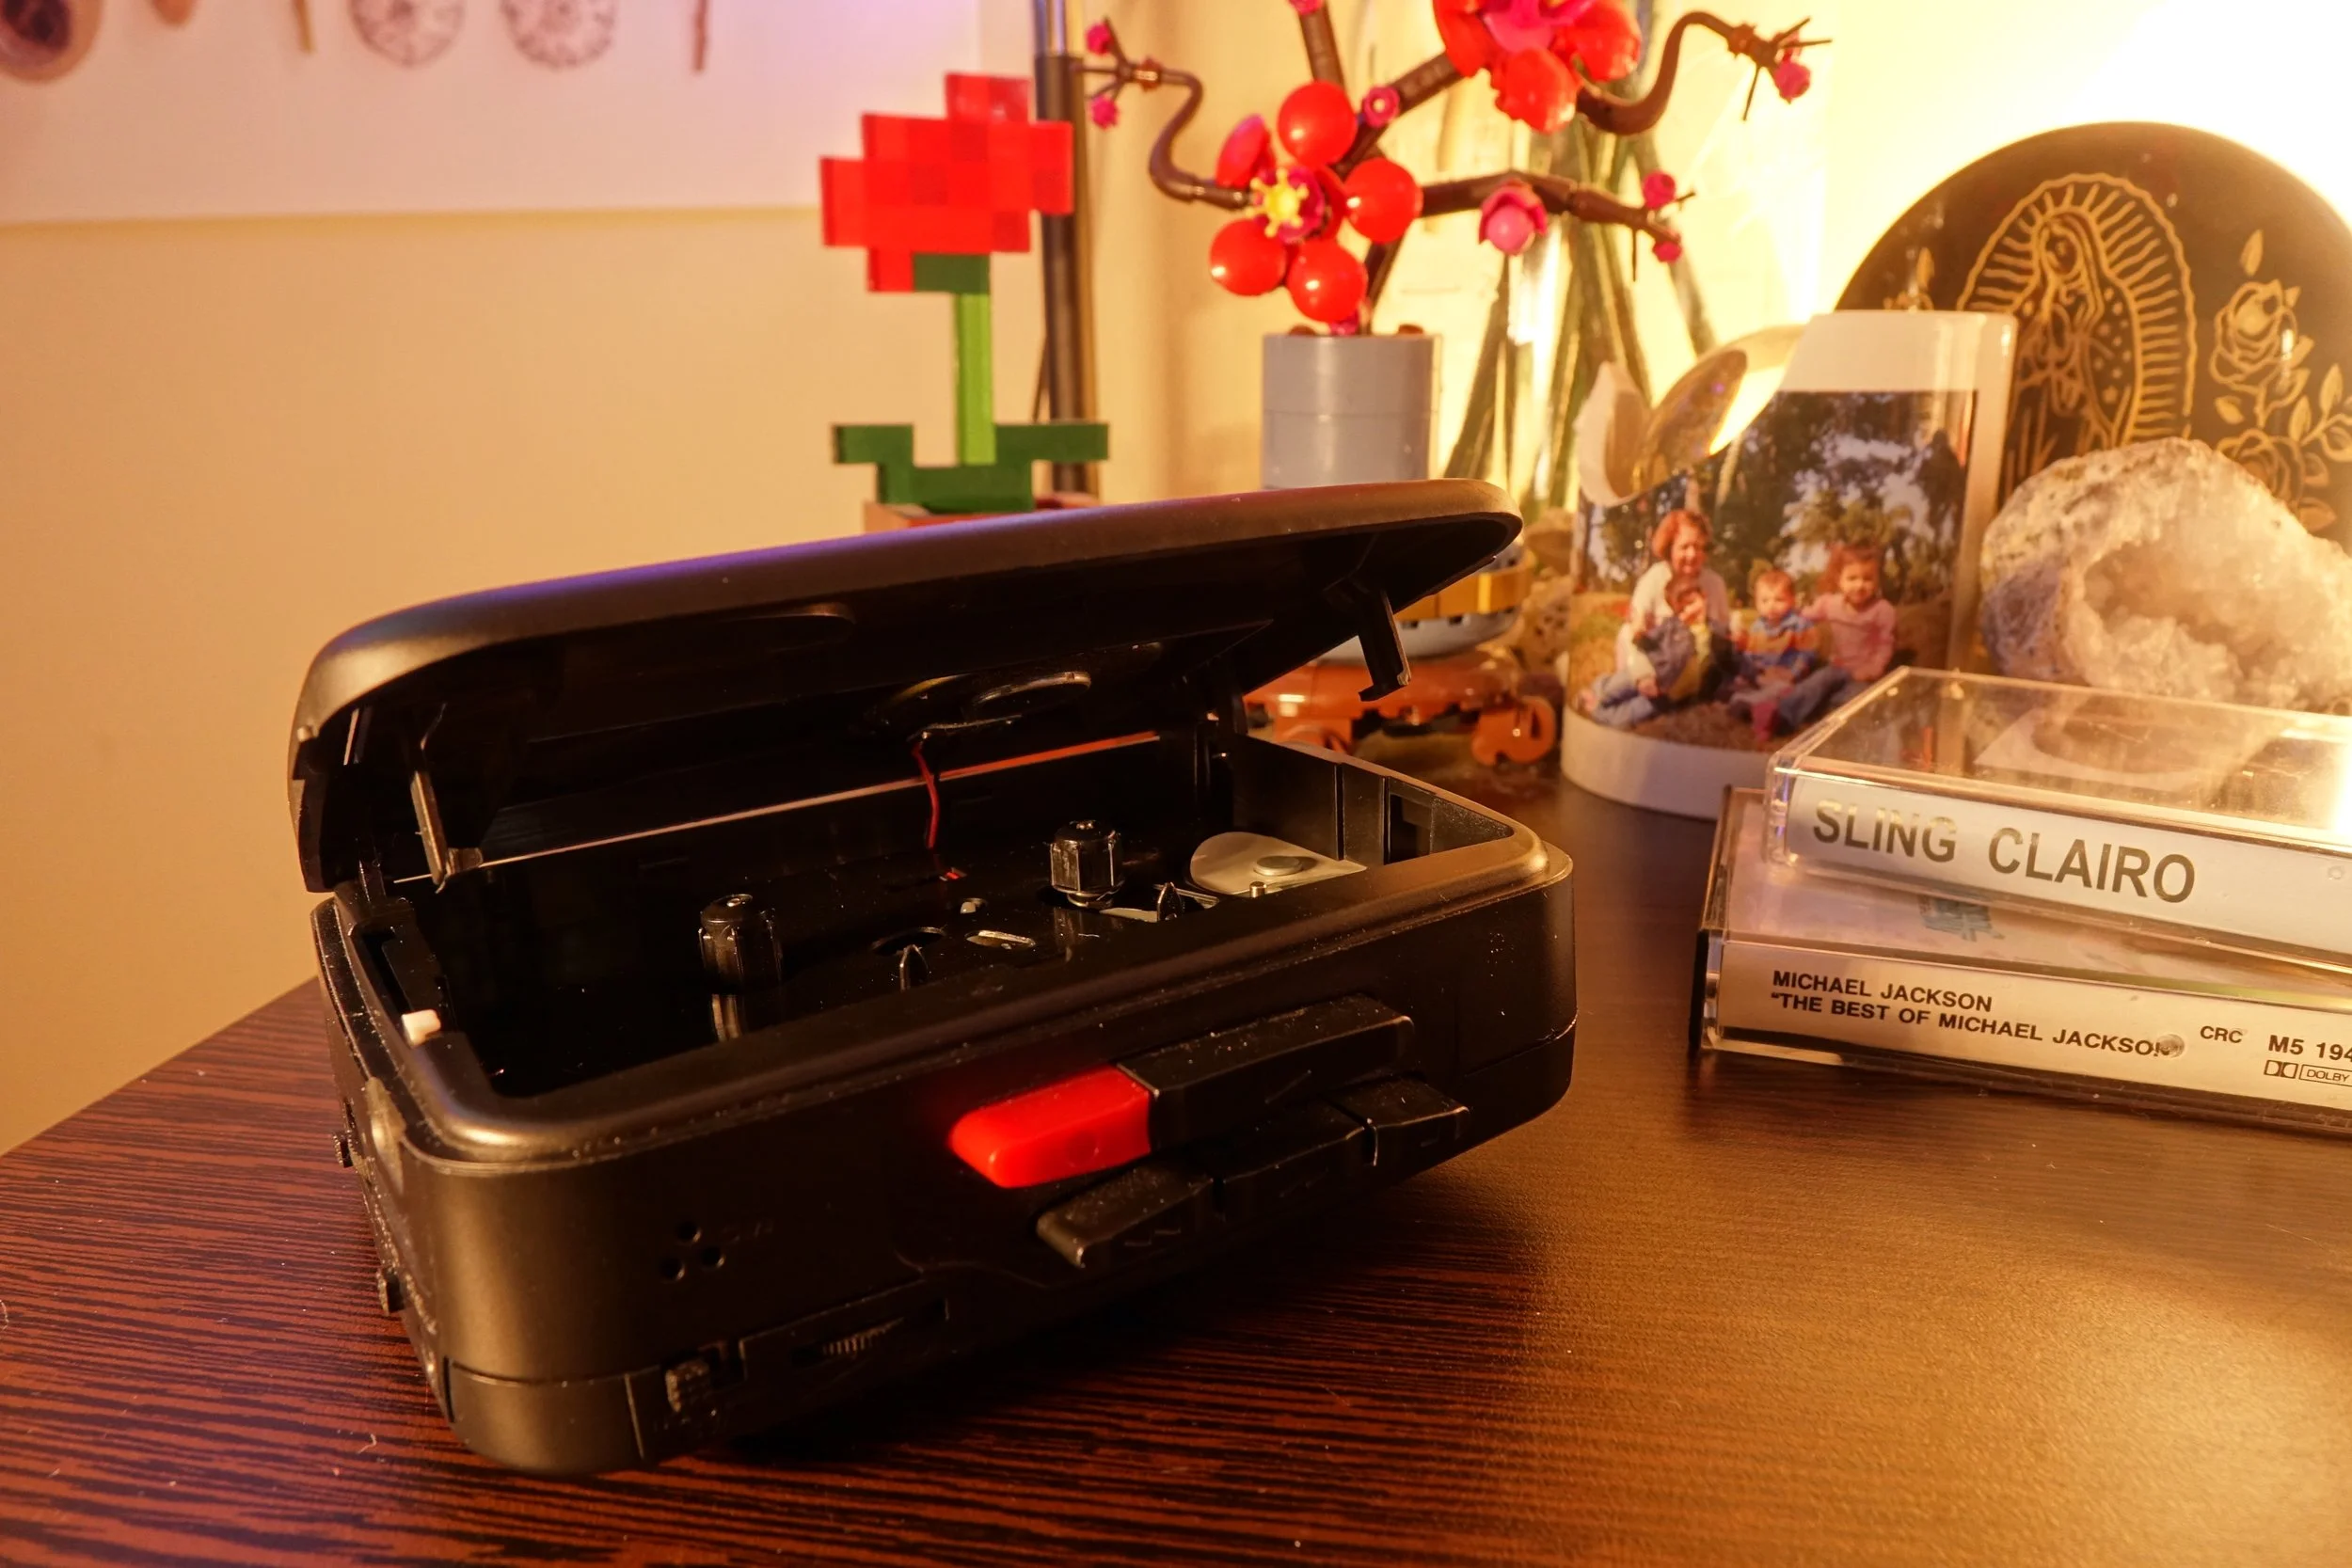
This weekend I reshot my plates for this project because I quickly realized the Walkman/ Jazz Club idea I had was a bit too ambitious for the time frame of this project. So I really simplified my idea to give myself enough time to create a decent result with a week less to work on it.
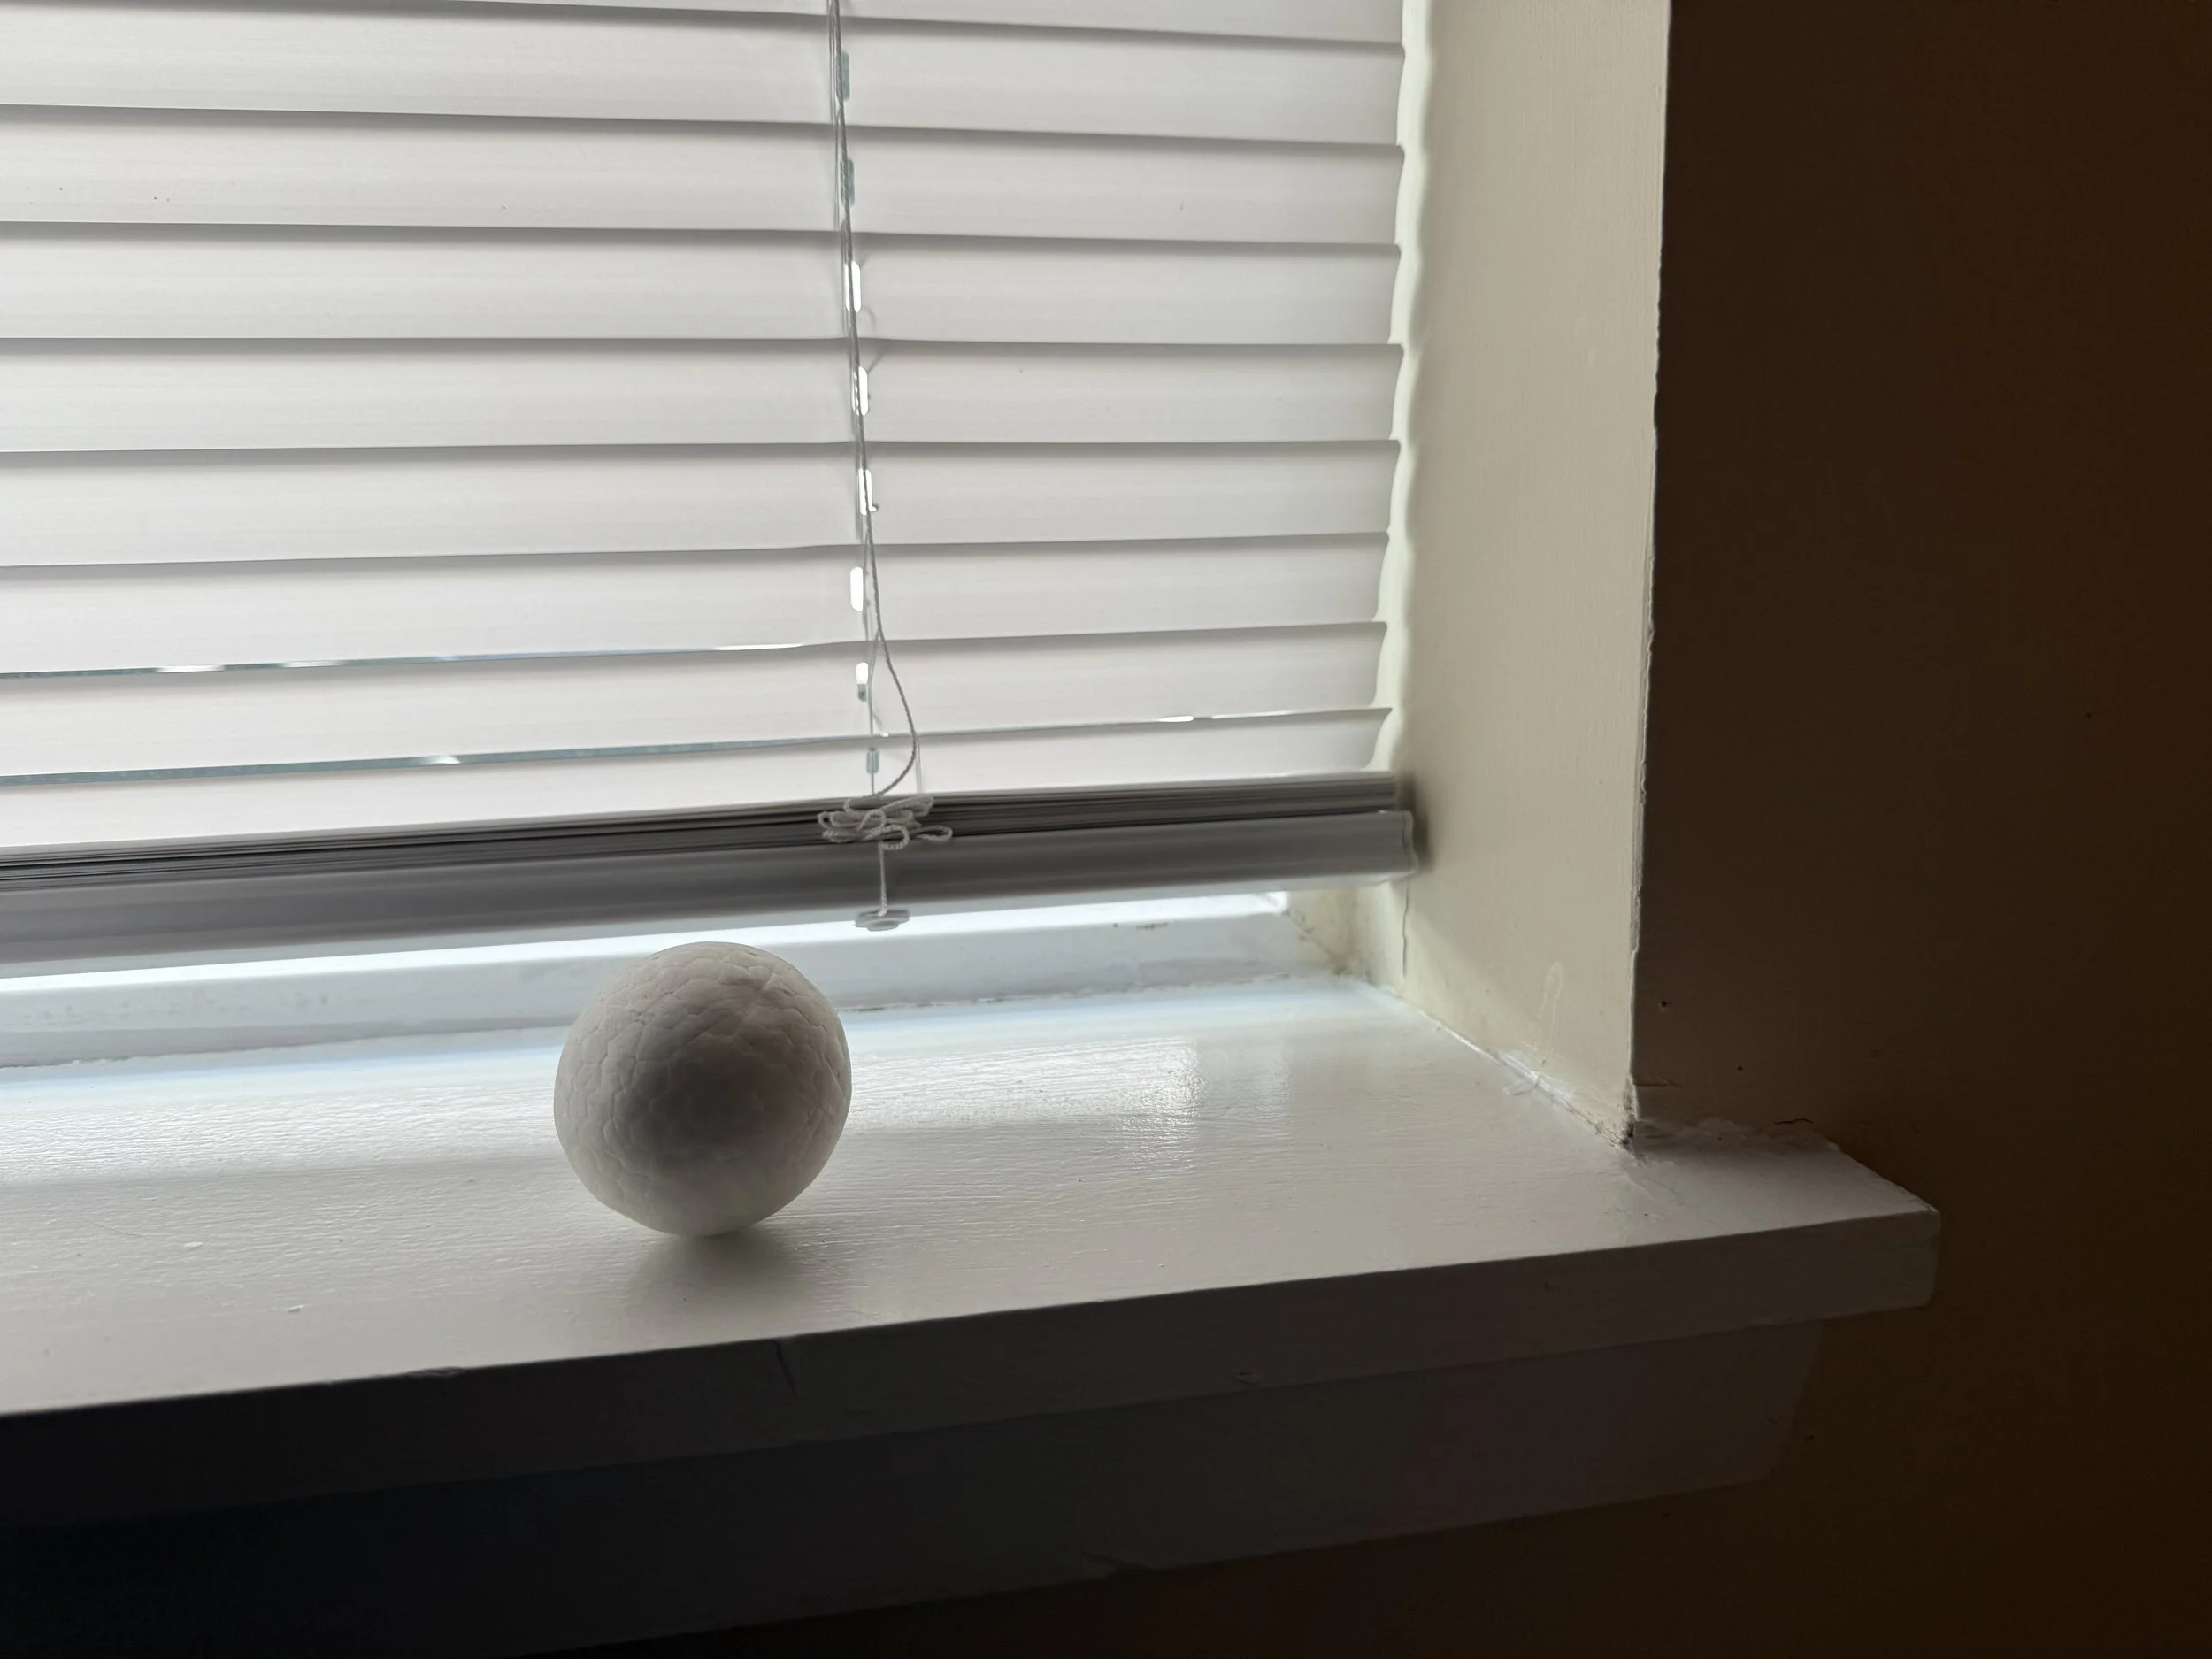
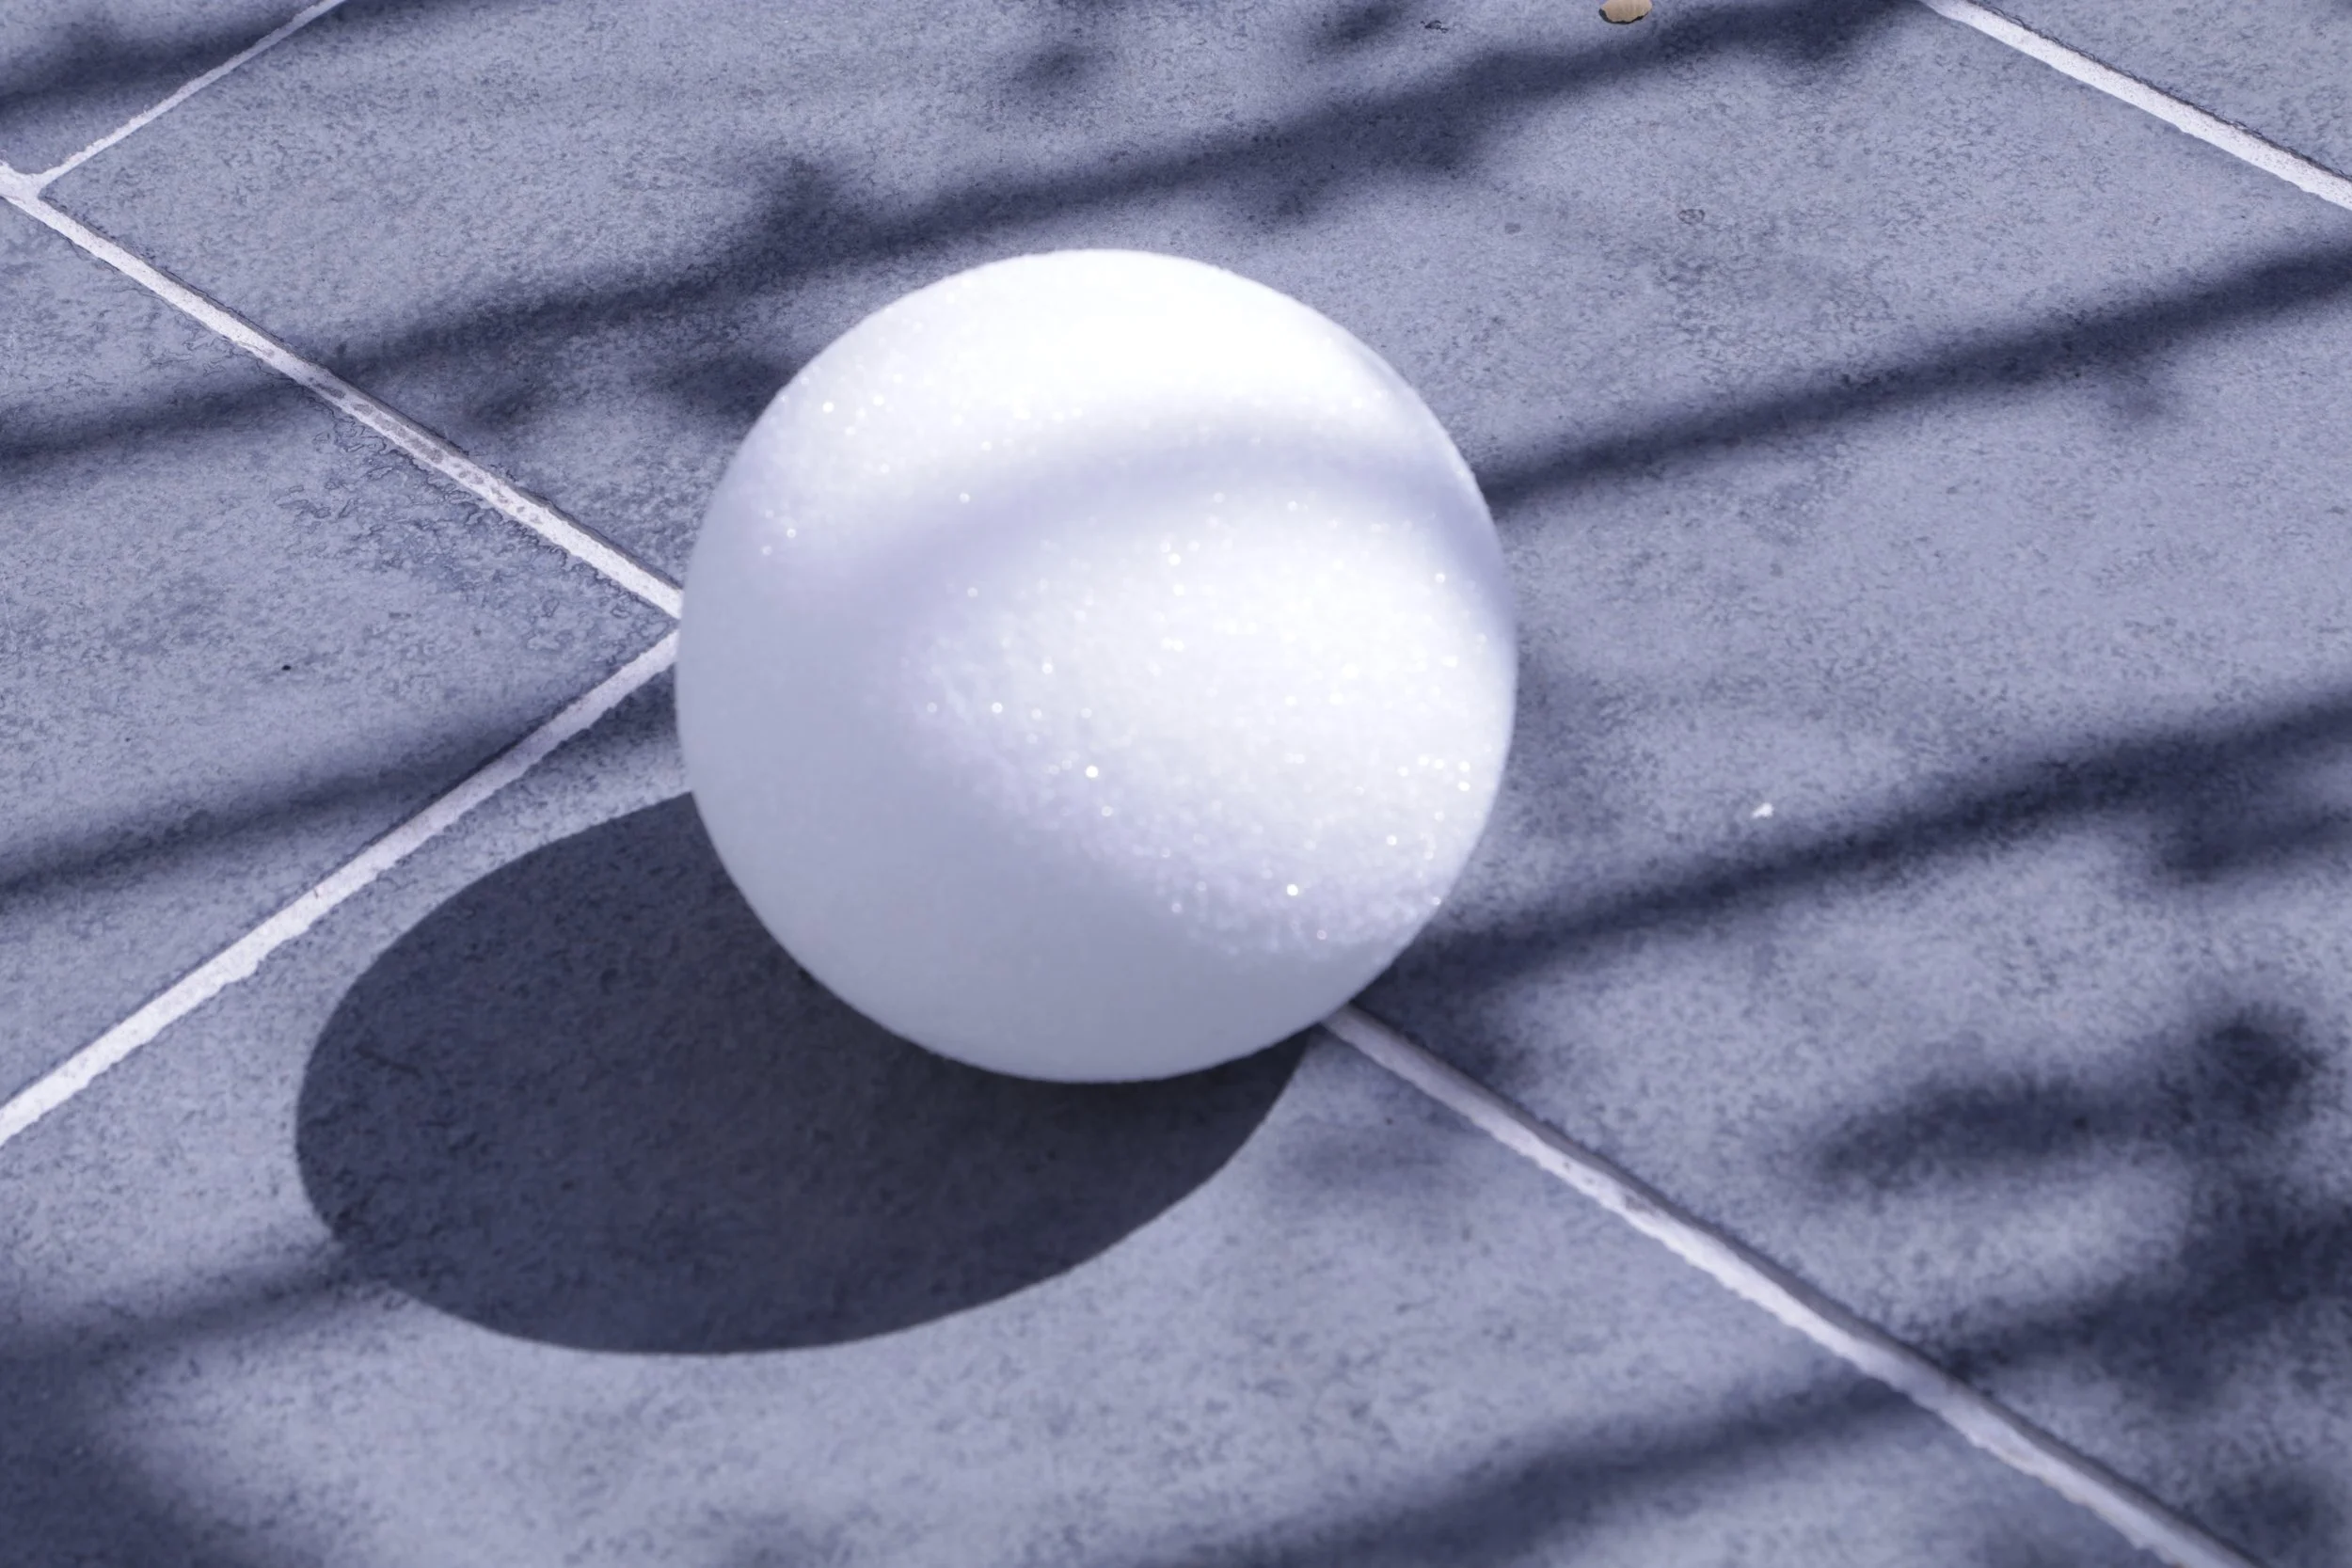
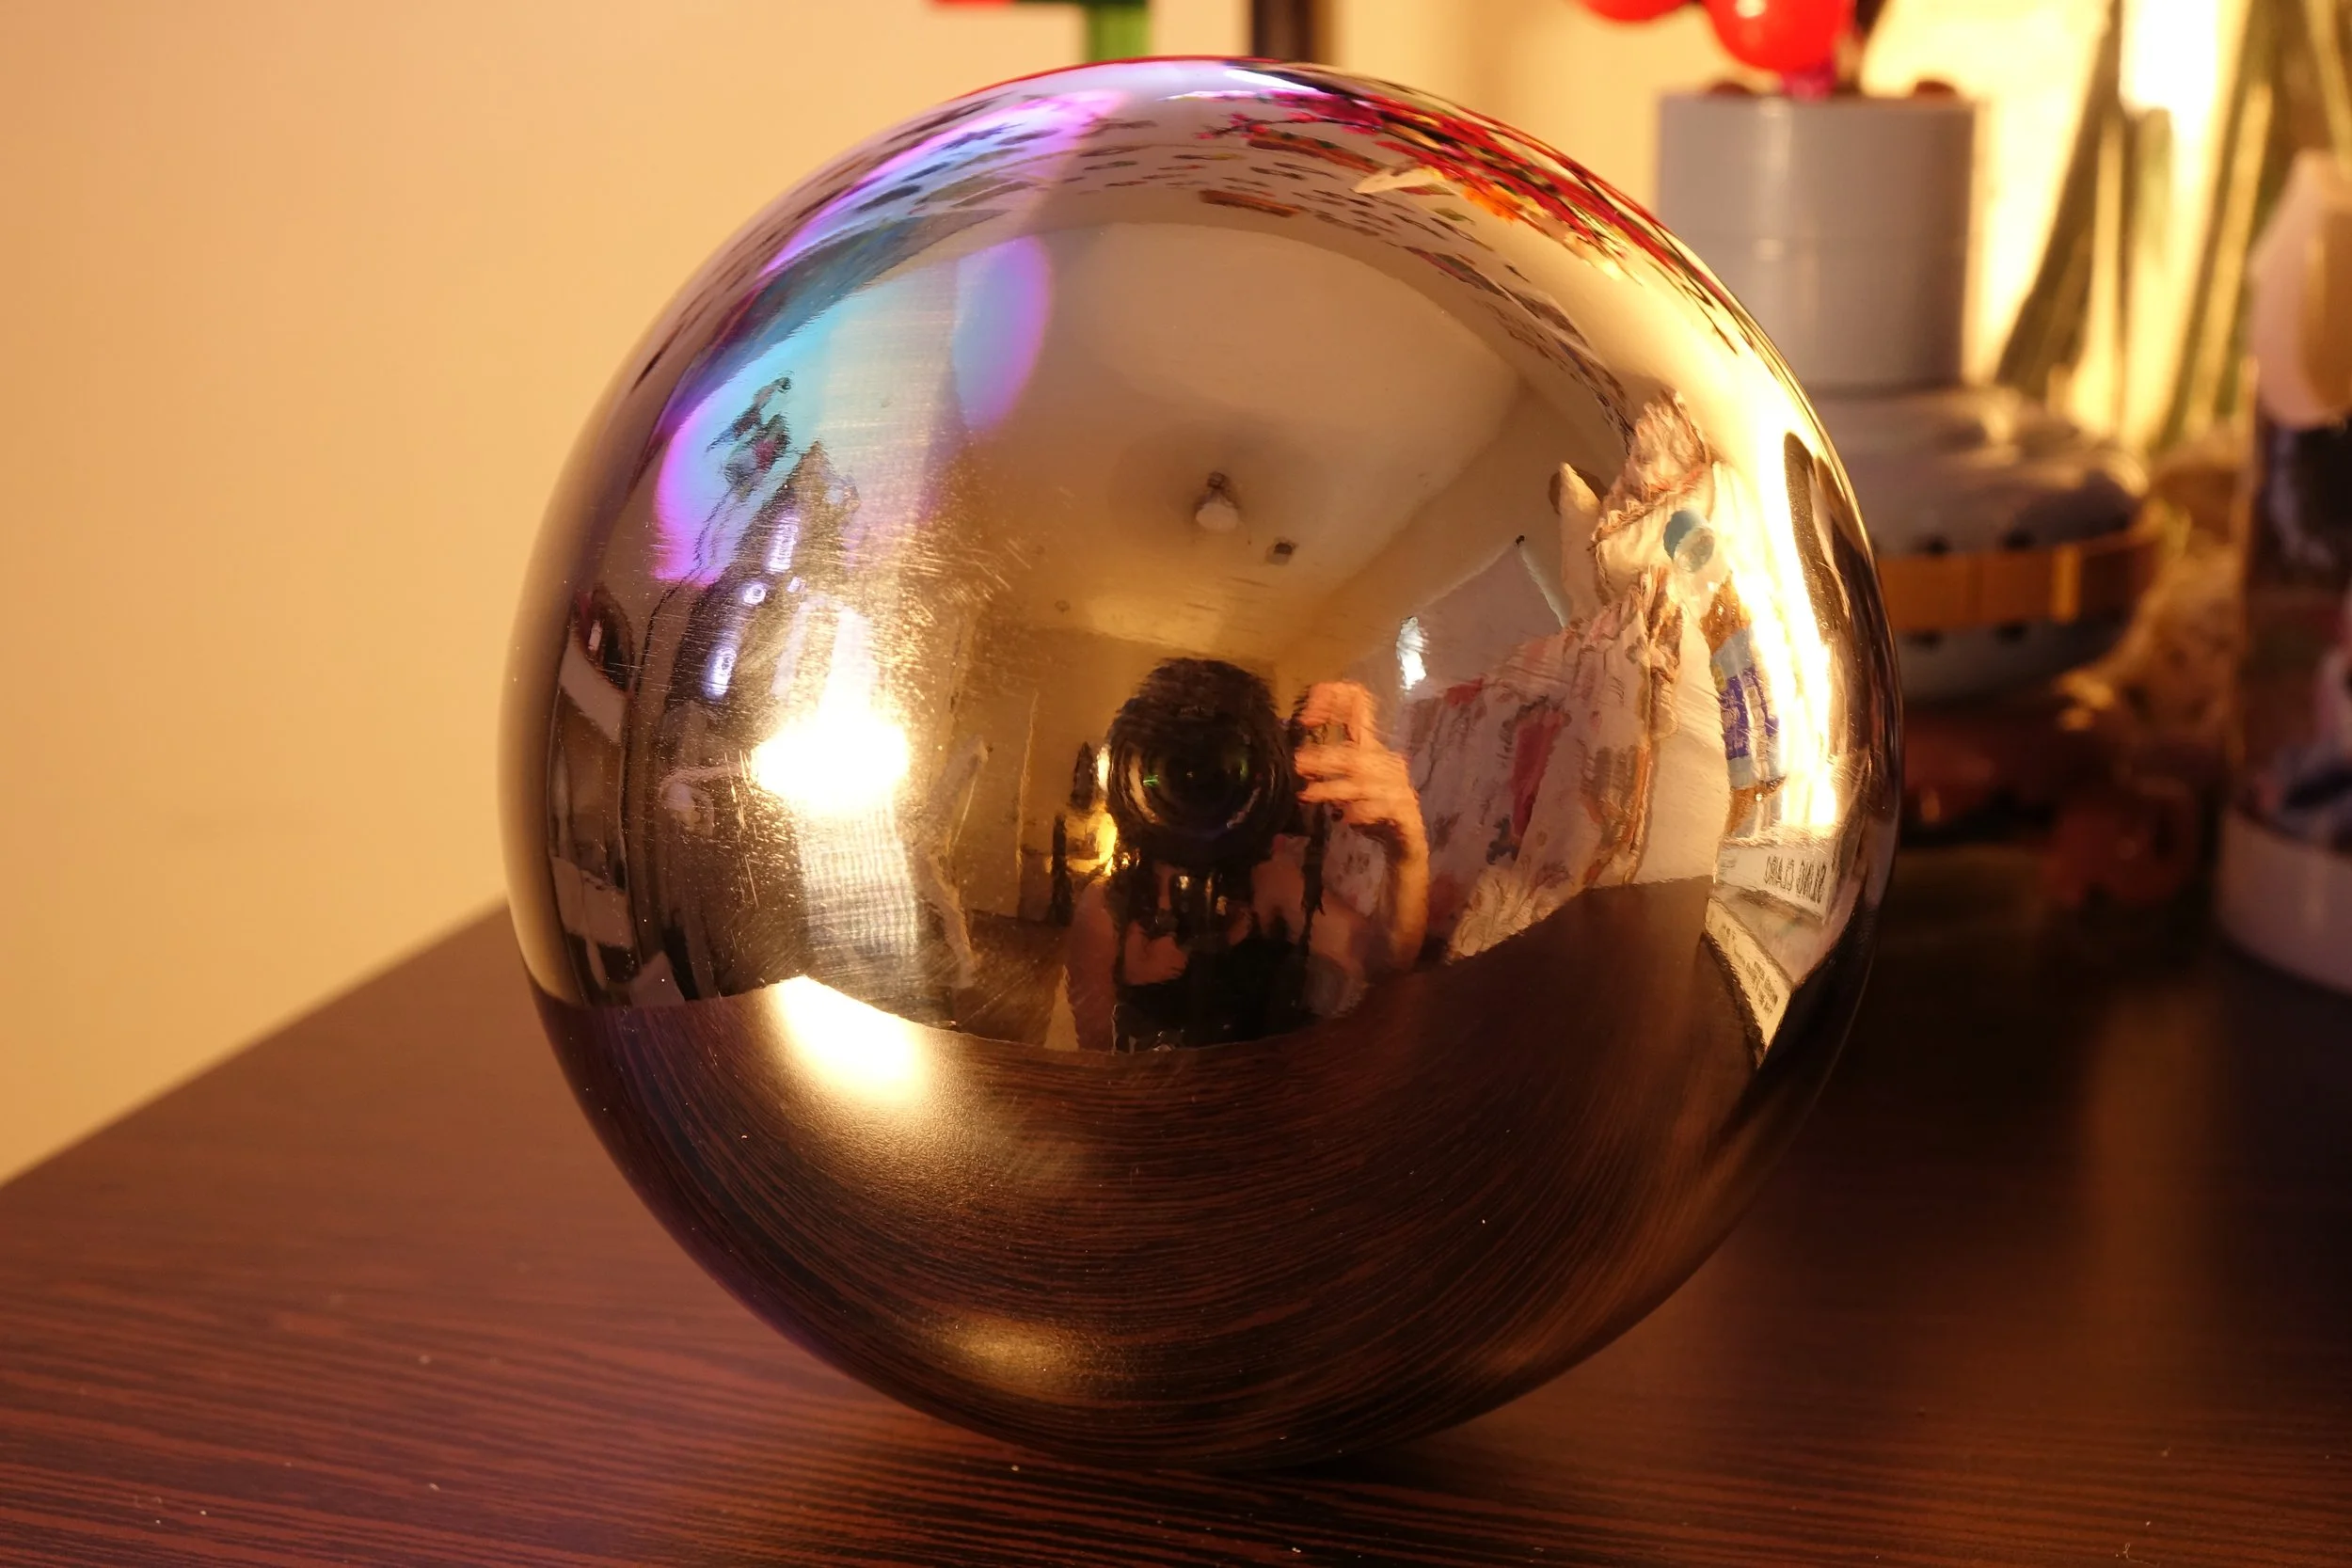
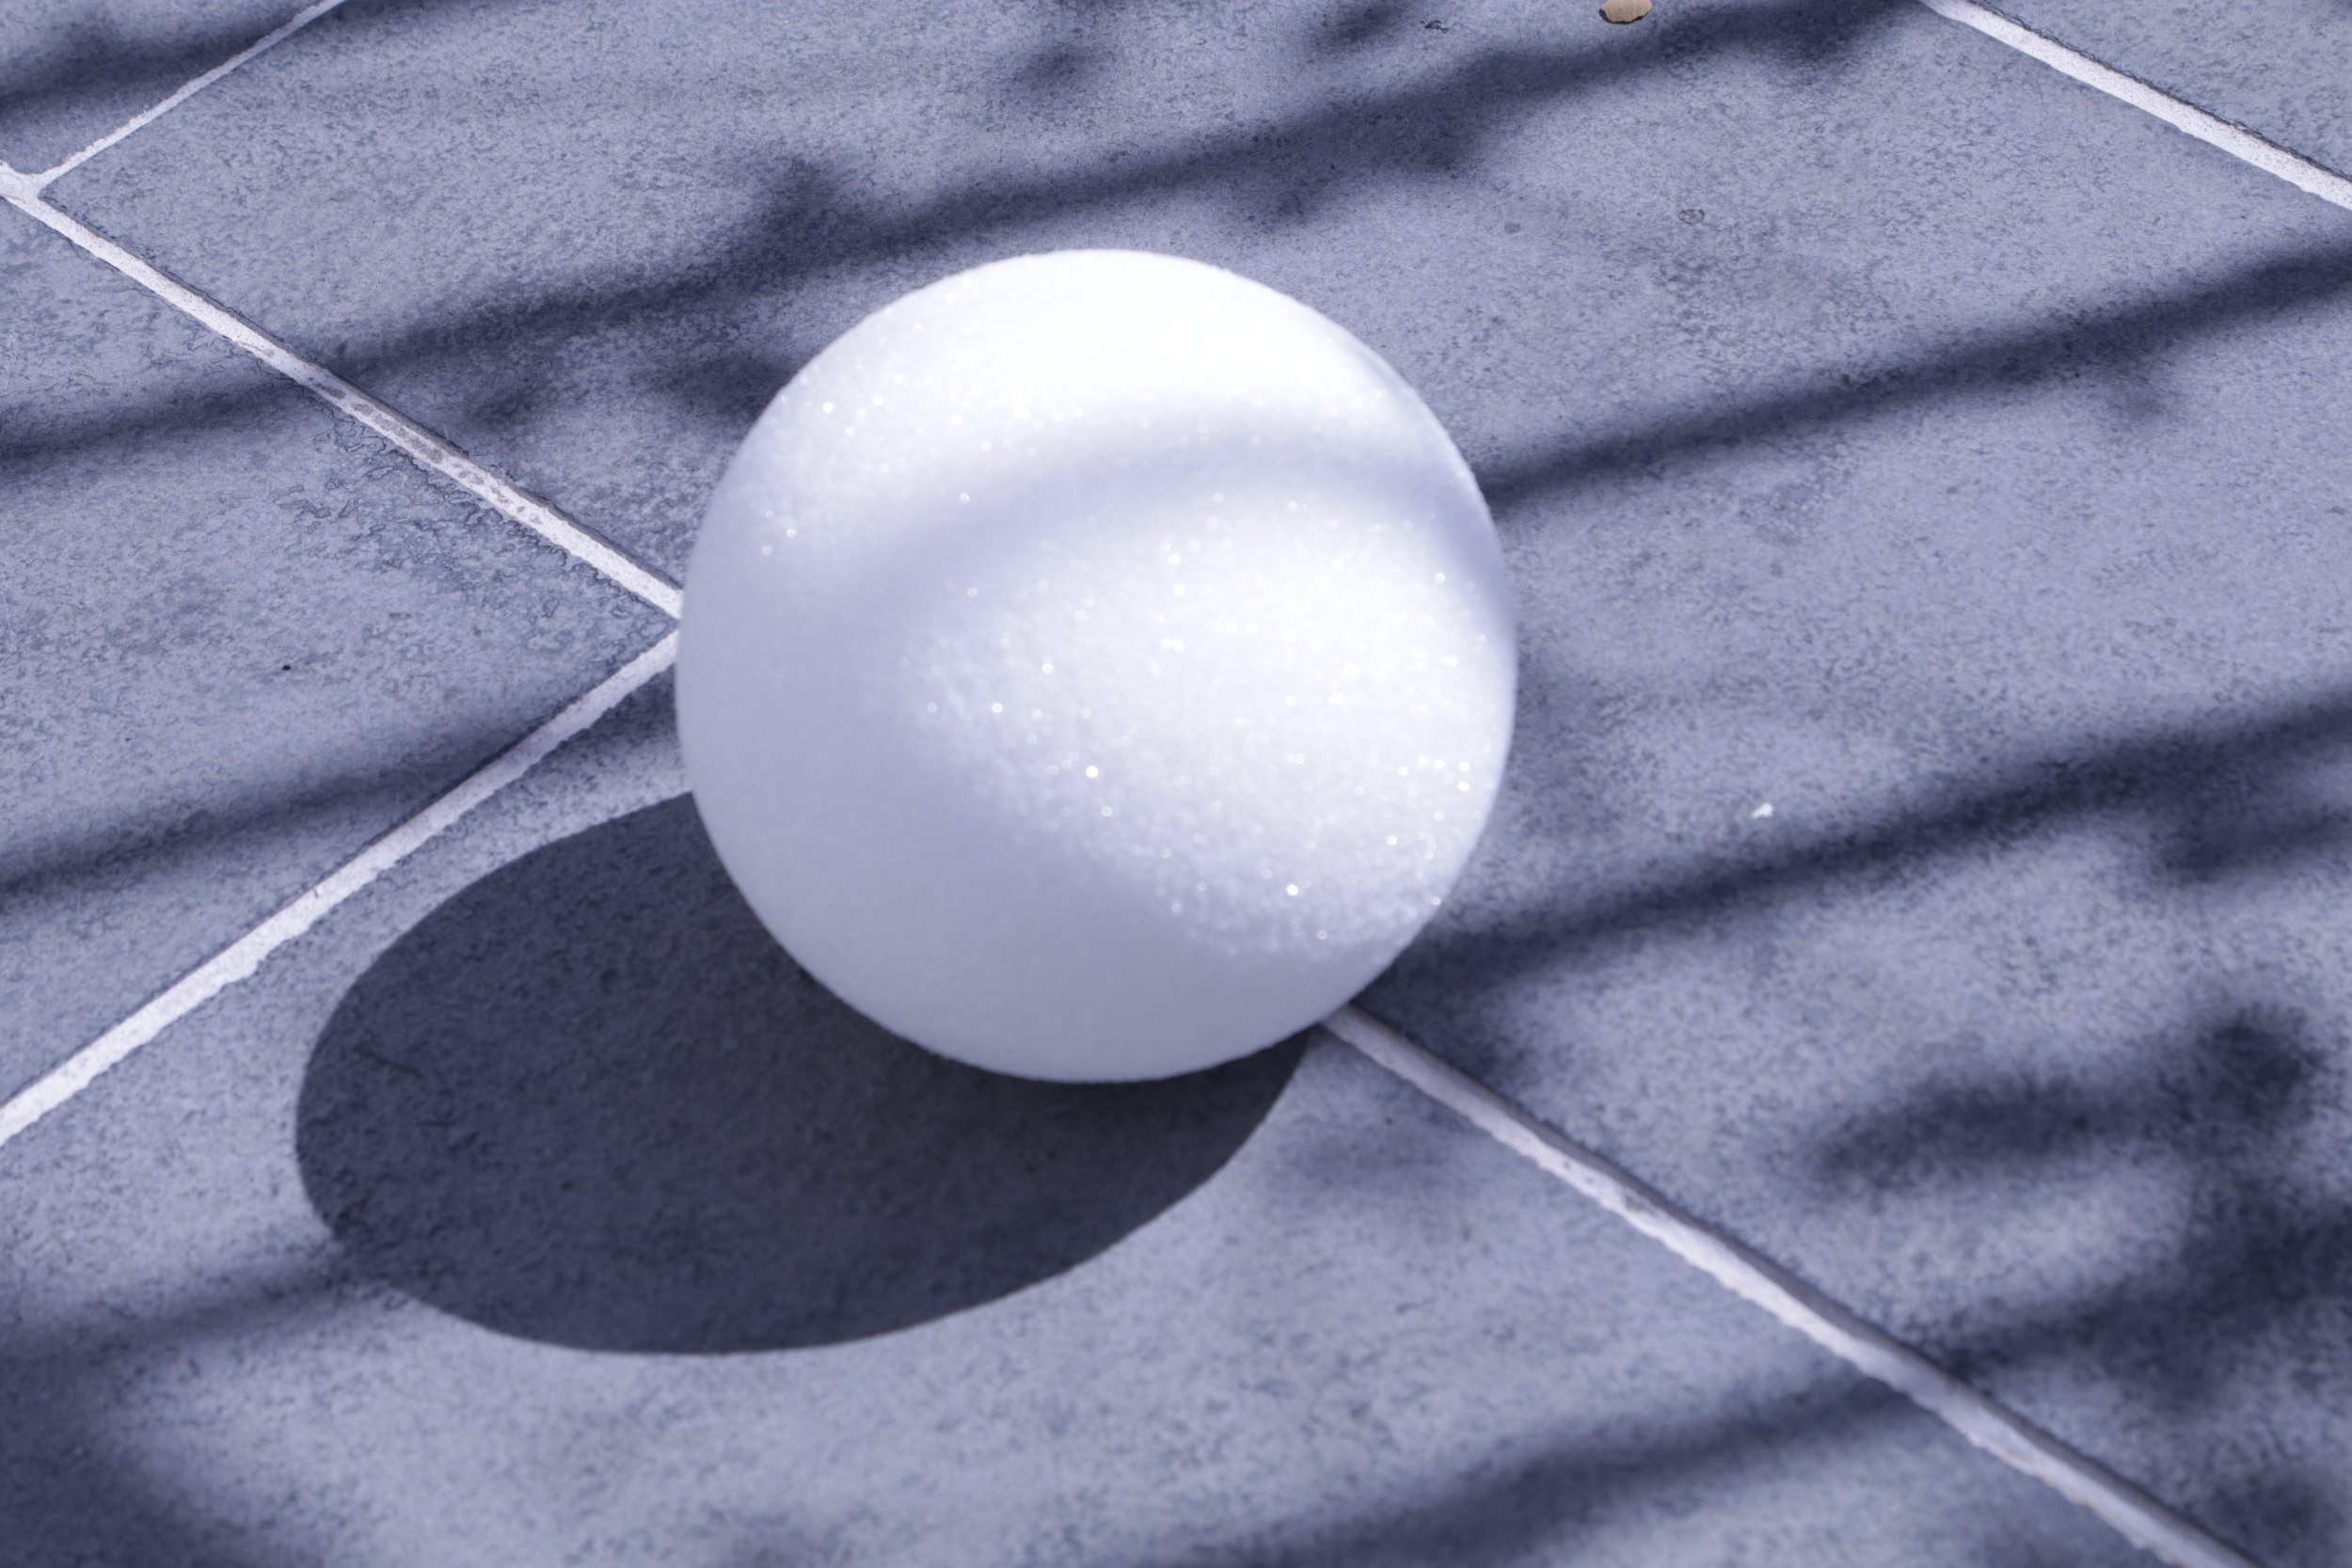
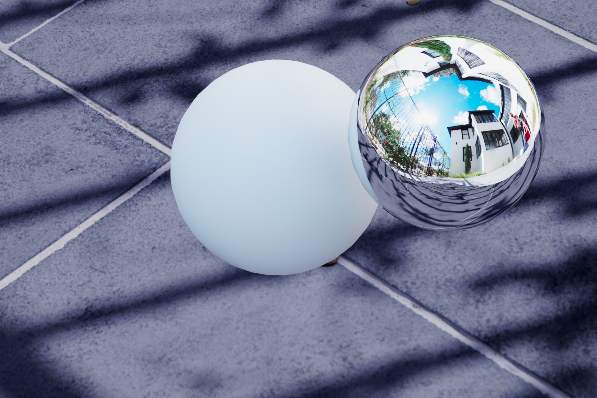
I also took clean plates and a lighting reference of a white sphere to match in CG, as well as an HDRI using multiple exposures of a chrome sphere.
Week 1
Update #2
Update #1
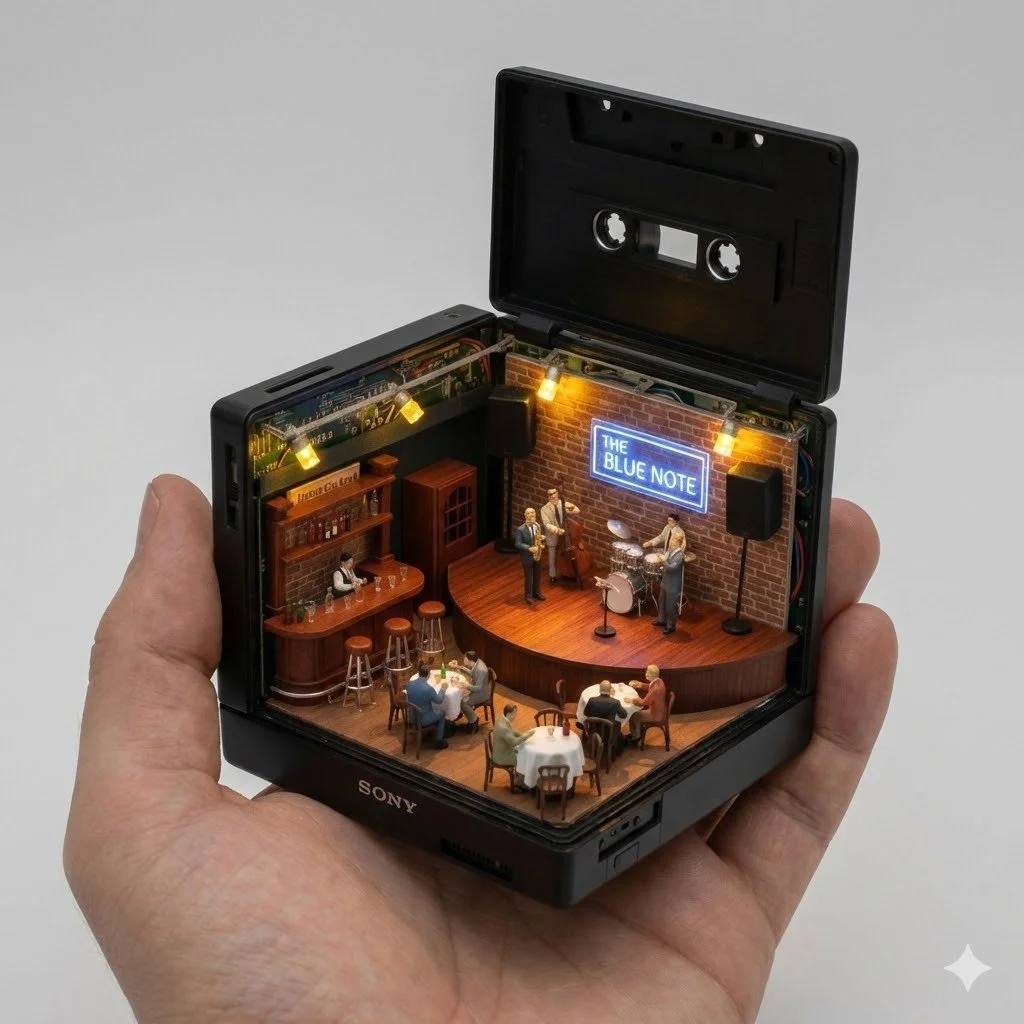
For project 3, we need to shoot a plate of a real object that can be opened digitally to reveal a cg interior. Here is my concept Google Gemini created based on my prompt idea for this next project. I want to use a walkman I have at home to open up and reveal a miniature diorama of a jazz club inside.
Project 2a + 2b: Camera Tracking + Customized Elements
Week 3
Update #2
Update #1
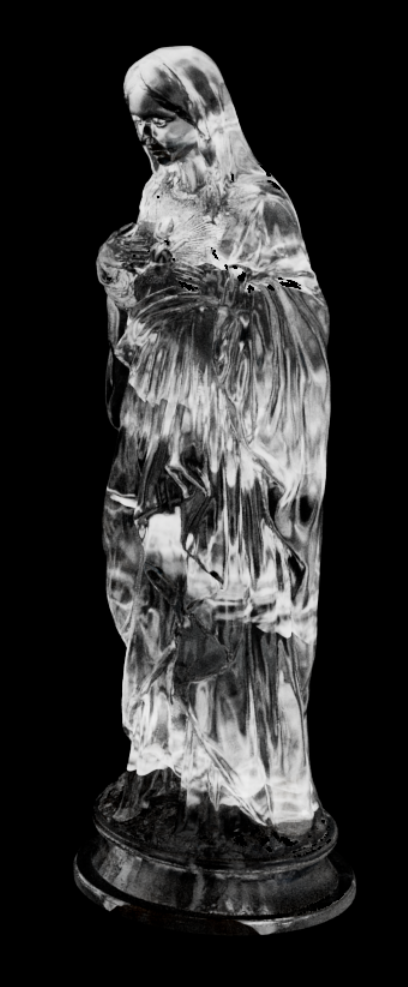
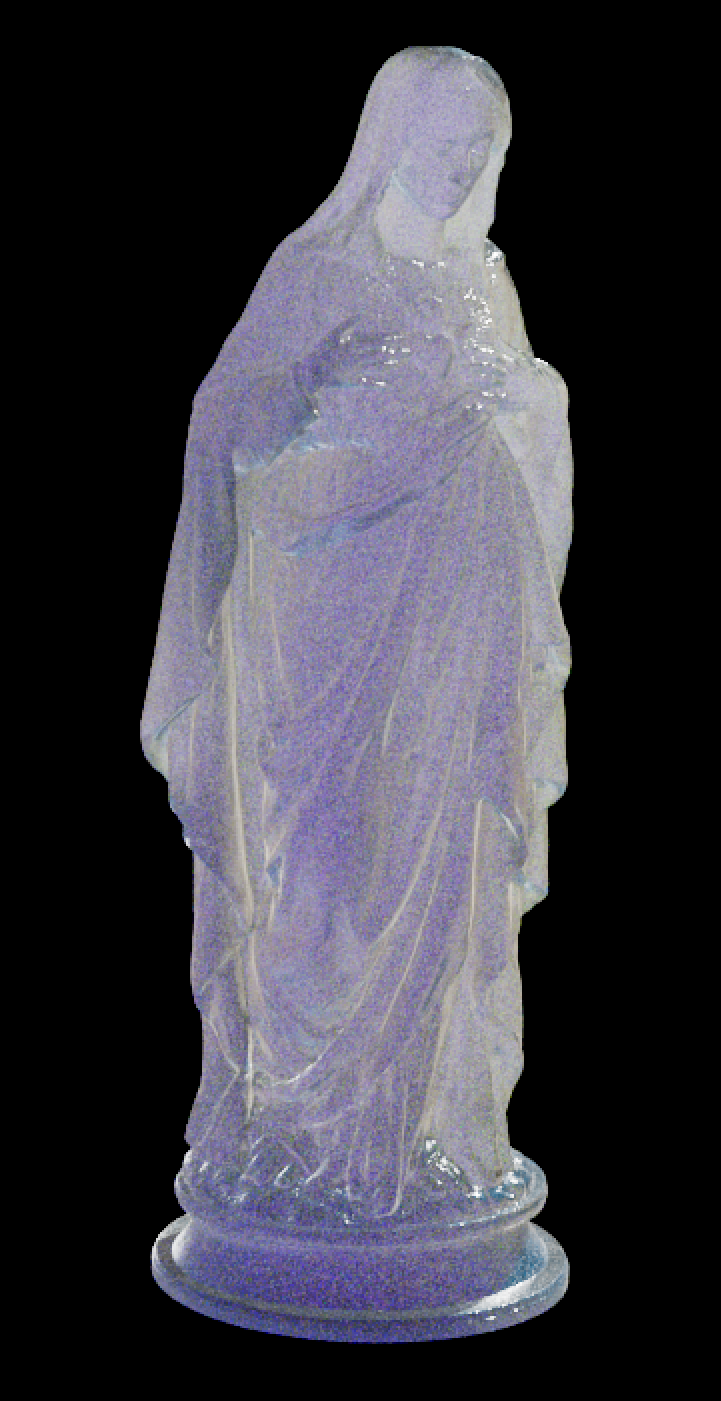
Here is my current progress, I have all render layers completely set up and using those I was able to achieve this decent looking Clear Quartz.
The biggest issue is the shadow, ambient occlusion, and caustics result. I think it is the biggest factor in breaking the CG integration into the plate.
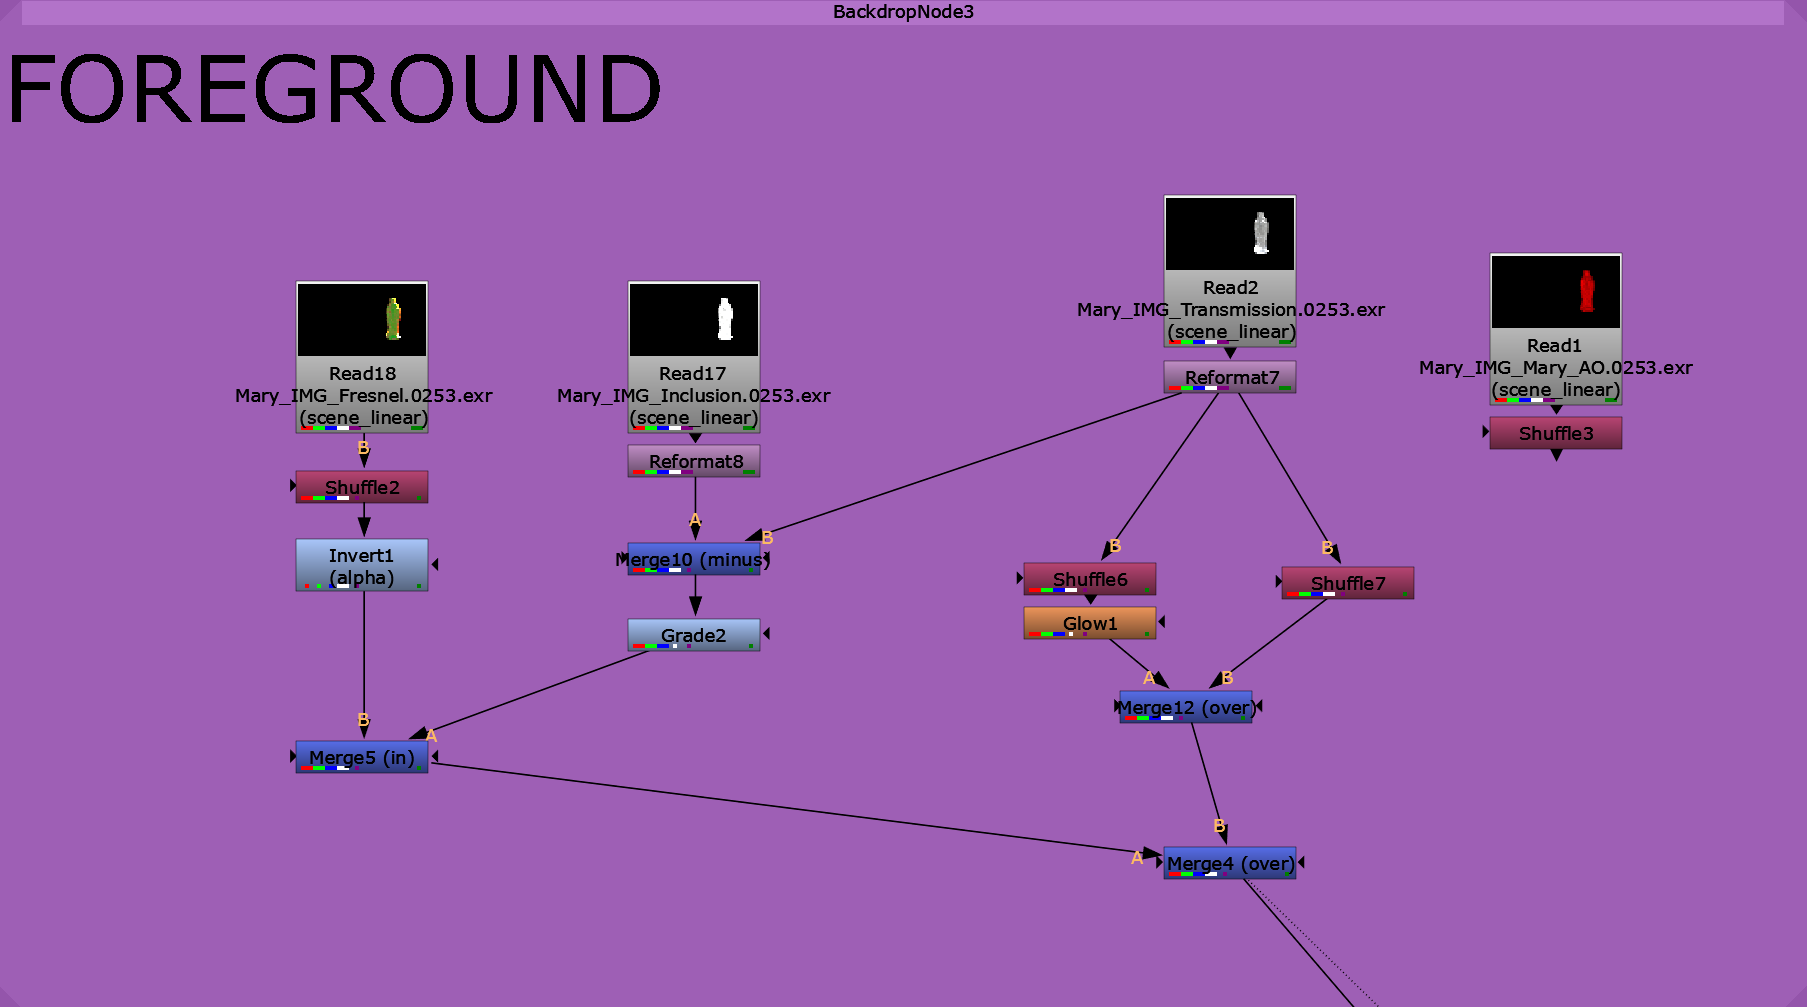
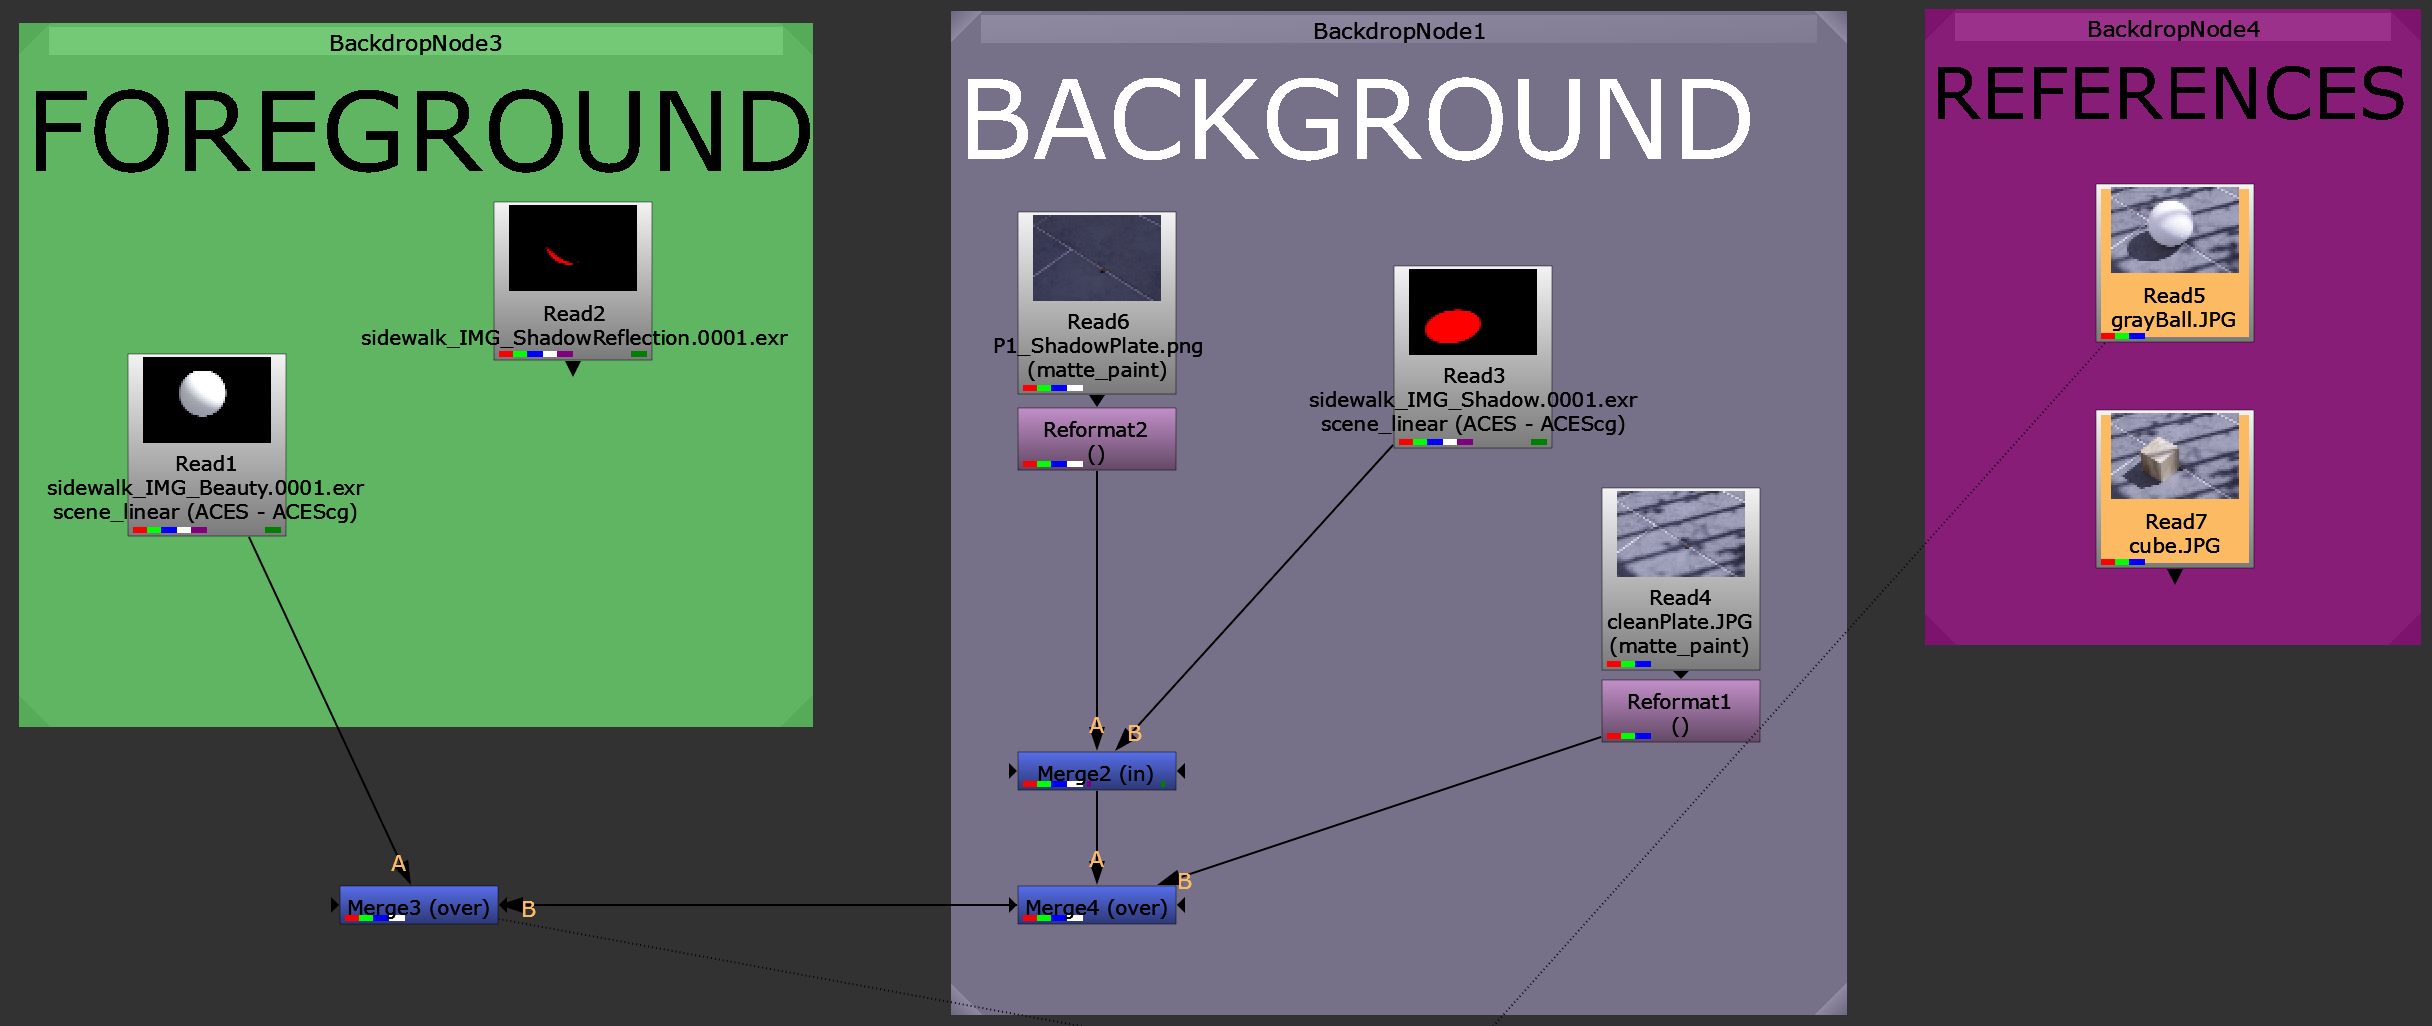
Foreground and Background Nuke Node Trees
For the clear quartz I created an inclusion render layer (pictured below), for refracted cracks that show up on the inside of clear quartz. I am using the Fresnel render layer to not have those inclusions visible in the edges of the object facing away from the camera. I also added a glow node to the specular AOV of the transmission layer to try and match the reference photo of the rock I took.
<- Inclusion Render Layer in Maya Viewport
spheres’ primary visibility are turned off and can only be seen through refractions
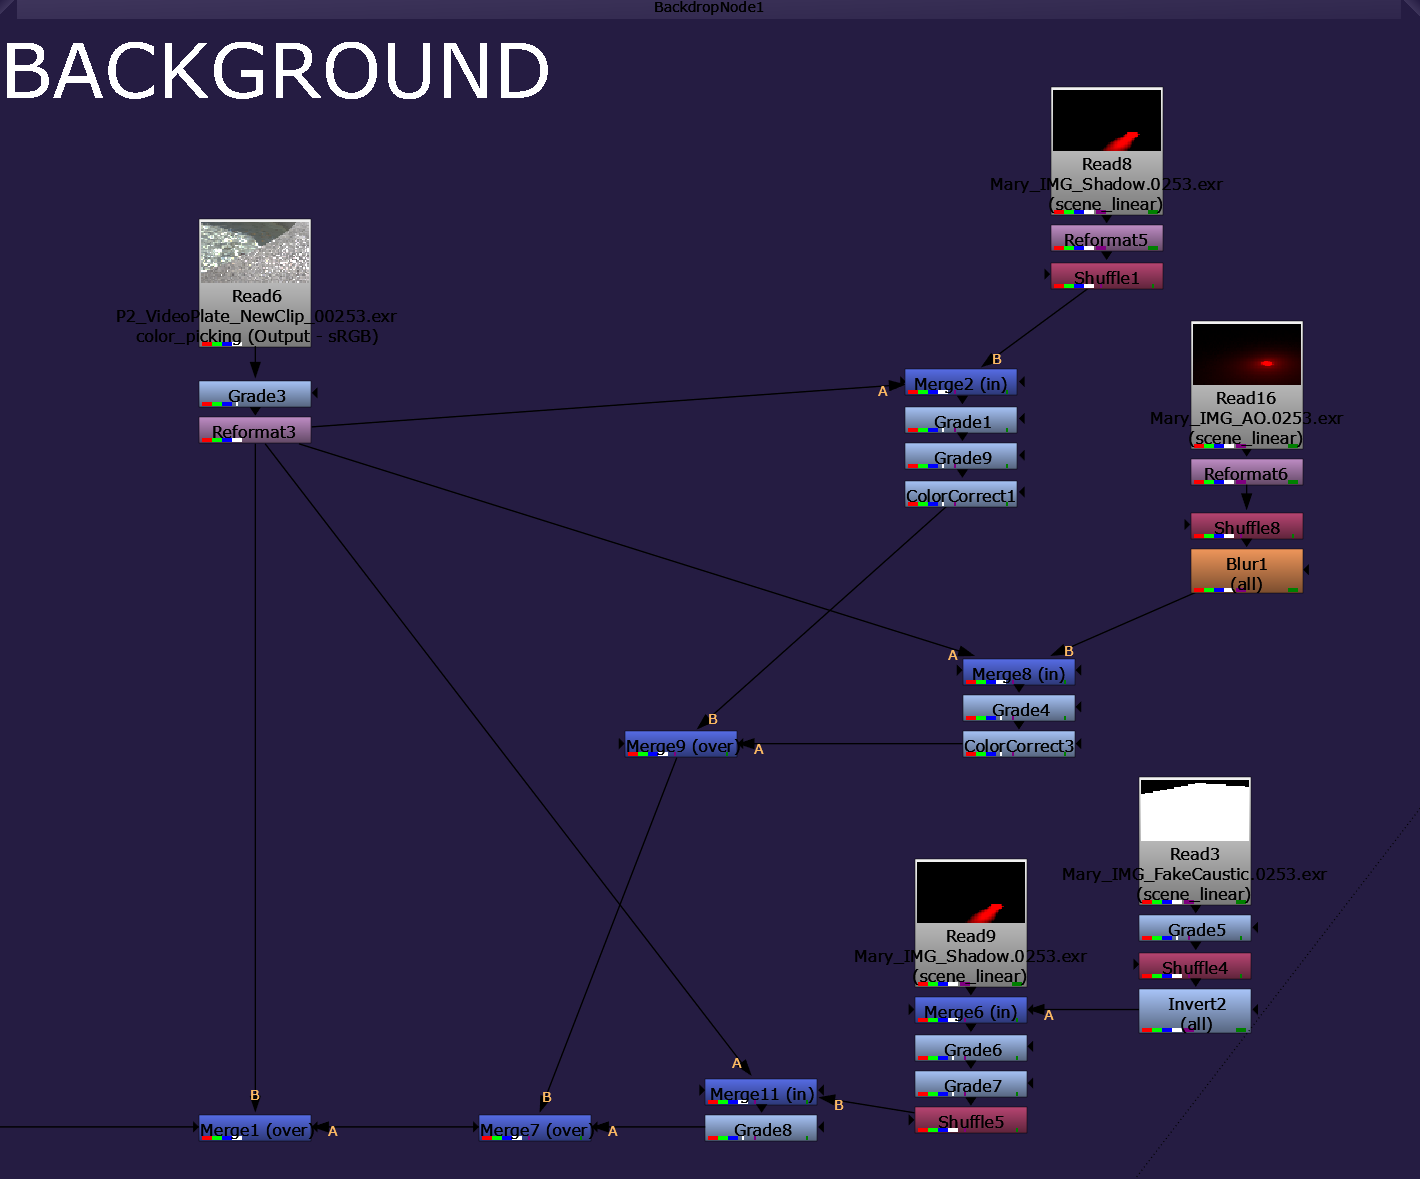
For the background I have the caustic layered on top of the AO which is layered on top of the shadow, and I think this method is giving me very little control of the actual result and is getting a bit too messy. I will prioritize this and possibly redo this node tree to get the best possible result.
<- Render Result in Nuke after merge minus from Transmission layer to isolate
Week 2
Update #2
New Tracking Result: I moved the position of the model just a bit up and it helped with sticking to the track a bit better.
Update #1
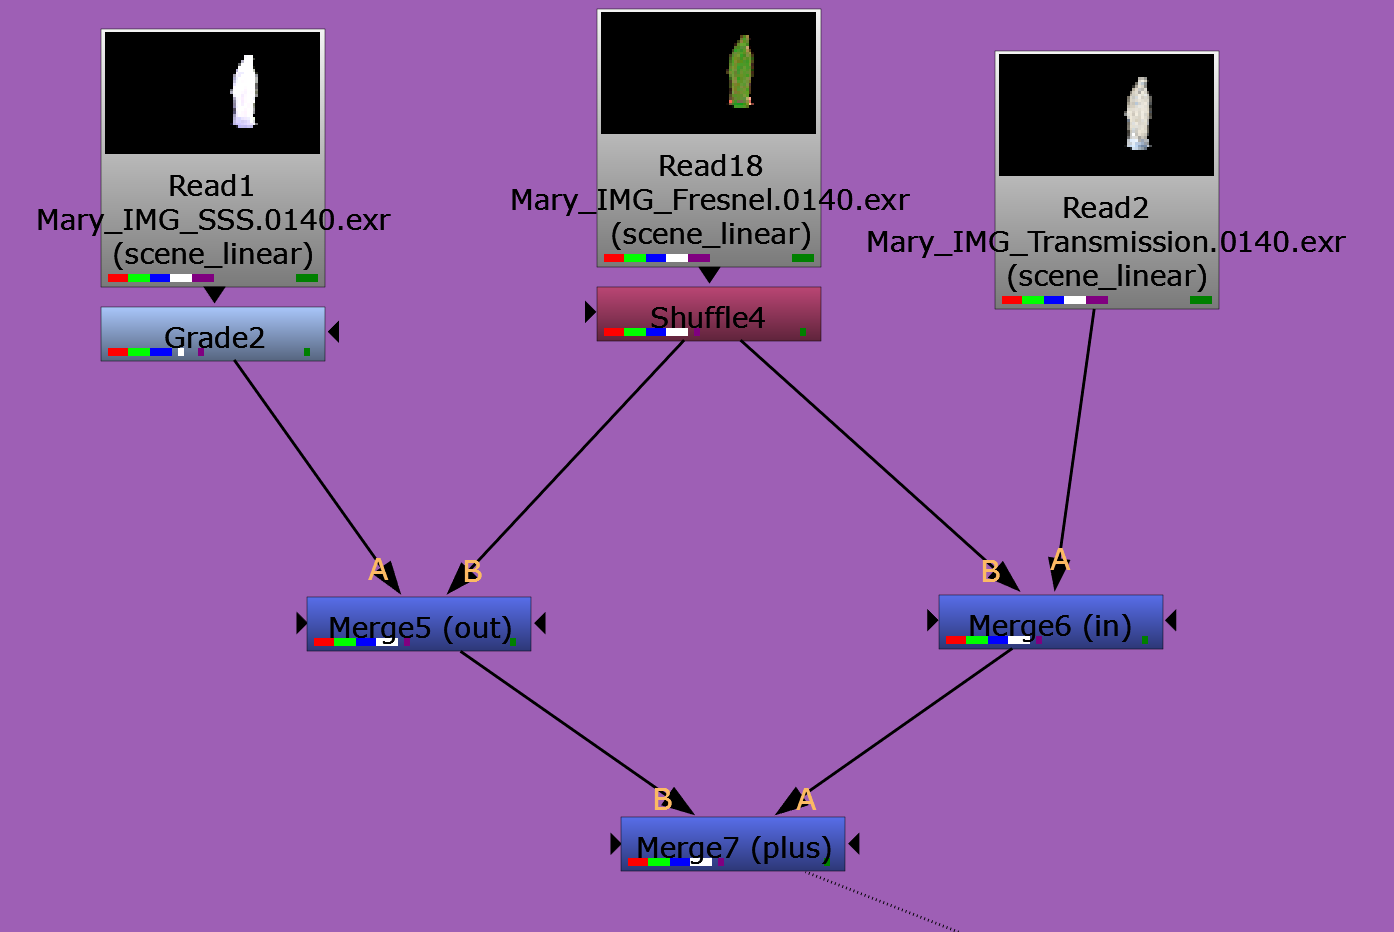
I also got this nuke script set up using a Transmission layer, a Subsurface layer, and a Fresnel layer as a mask to combine the materials and give it this crystal look.
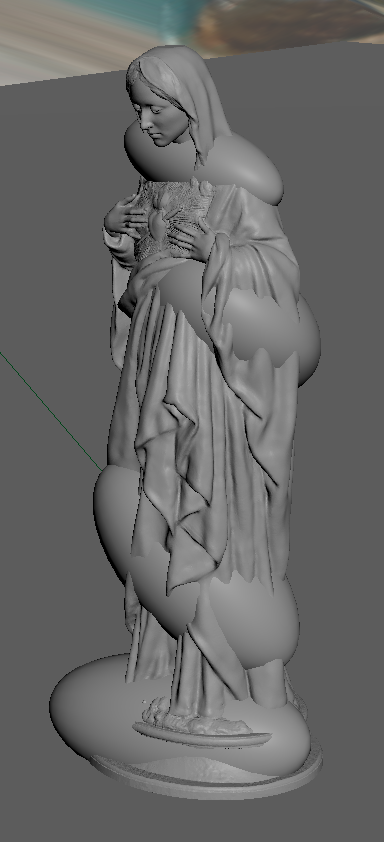
Tracking Result with Chosen Model - position might need to be adjusted to help track work better
Week 1
Update #2
Update #1
Today I went with a class mate to to shoot our plates for project 2 with a Sony RX10 camera rented from SCAD’s resources. We went to Orleans square here in Savannah and took some really nice photos by a fountain for our projects!
Clean Plate + Reference Plates
Shadow Plate
Camera Tracking Progress
Clean Plate Video to Camera Track
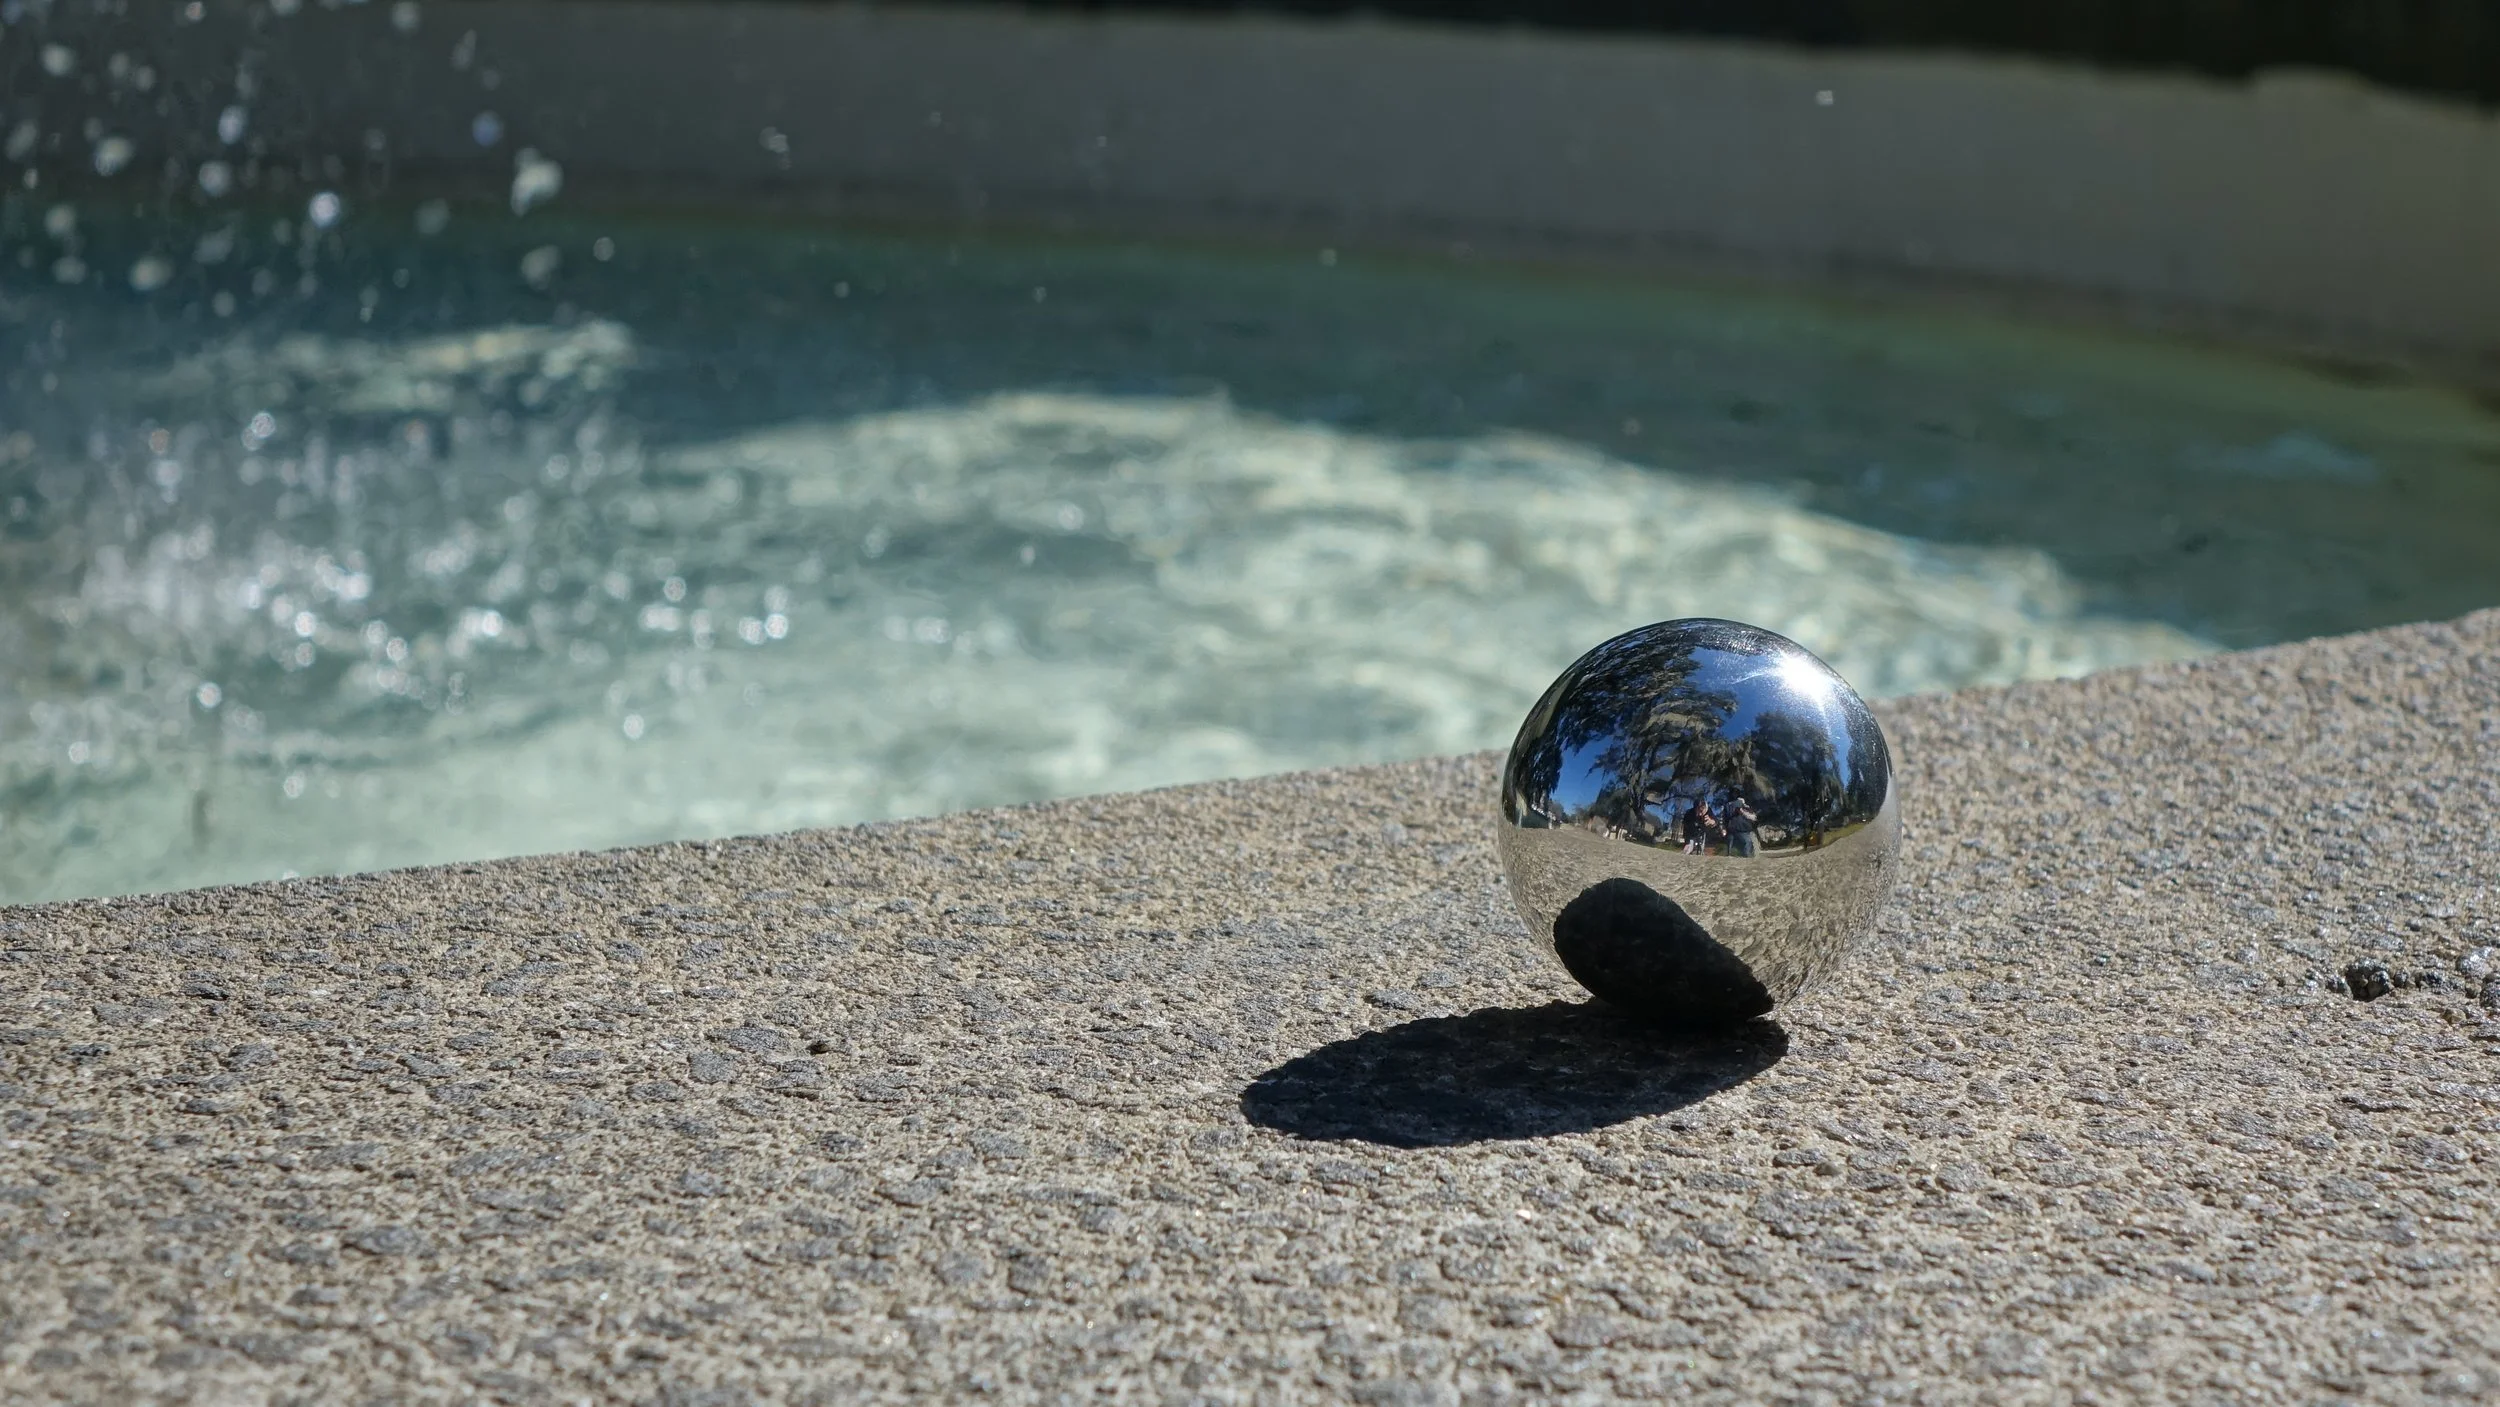
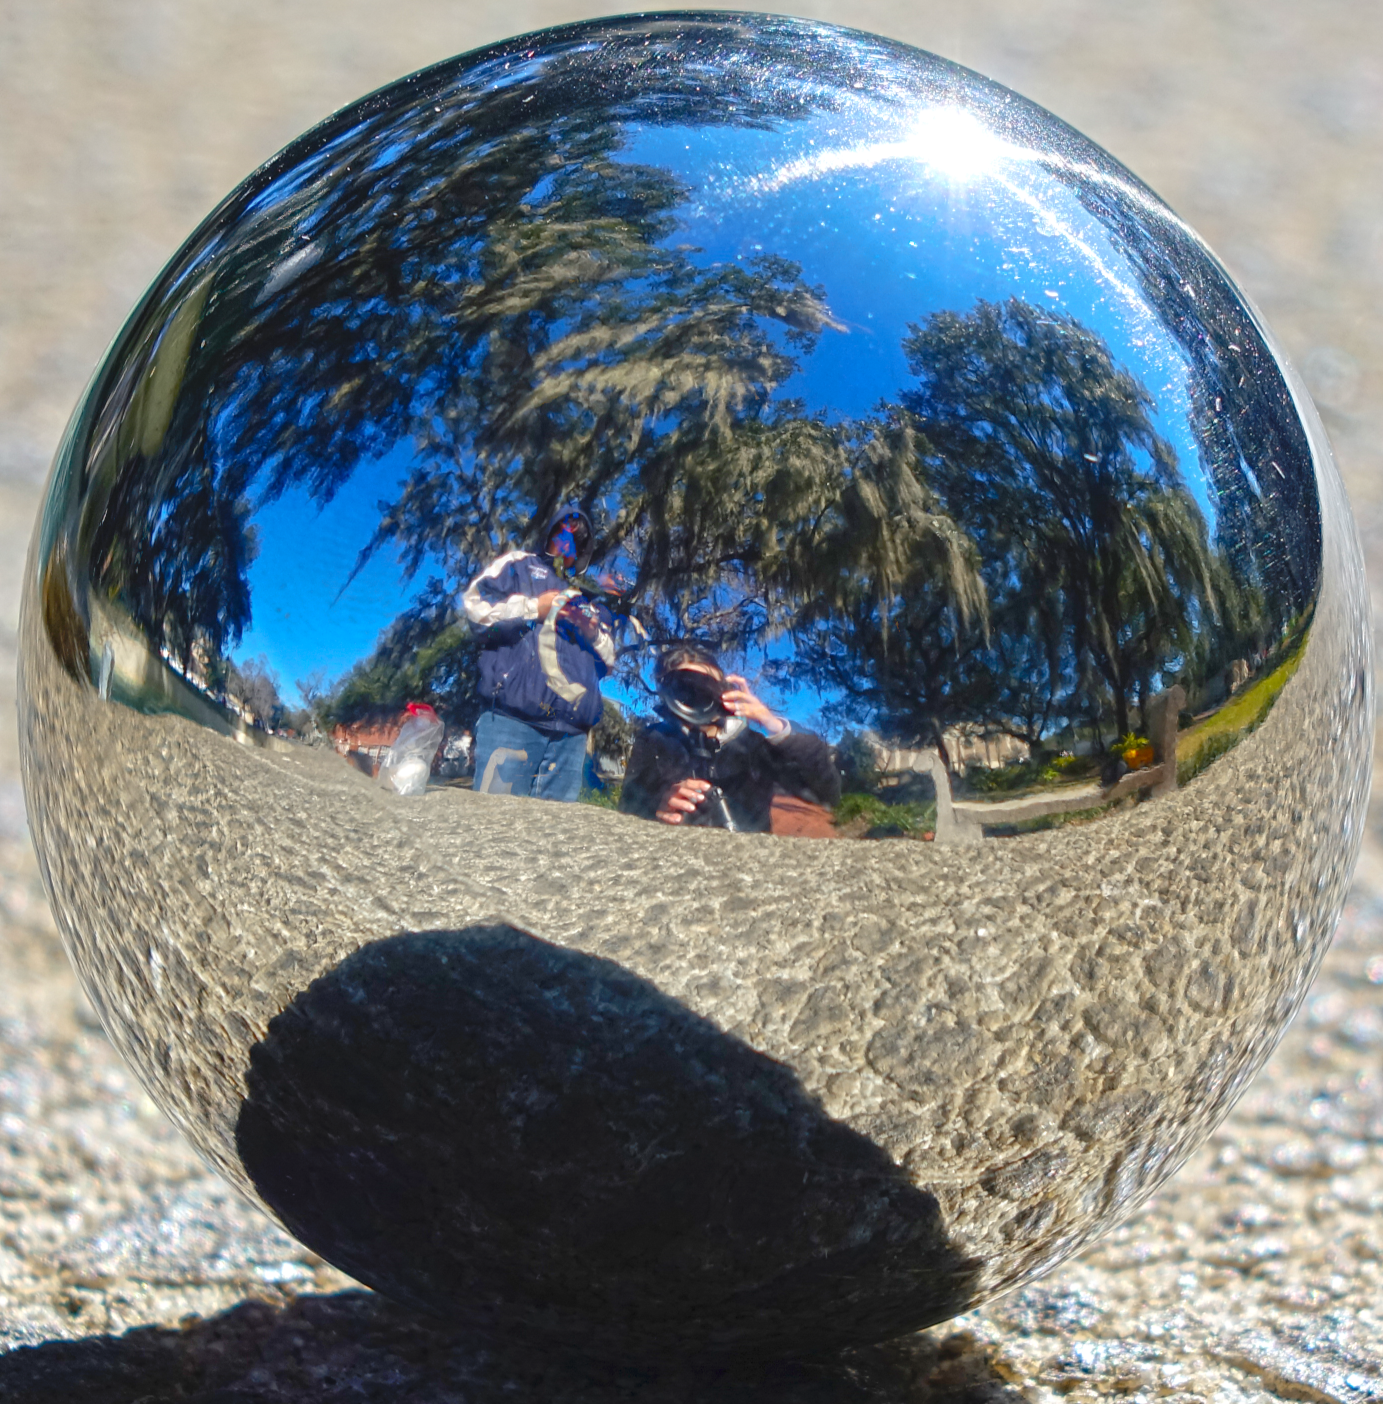
HDRI
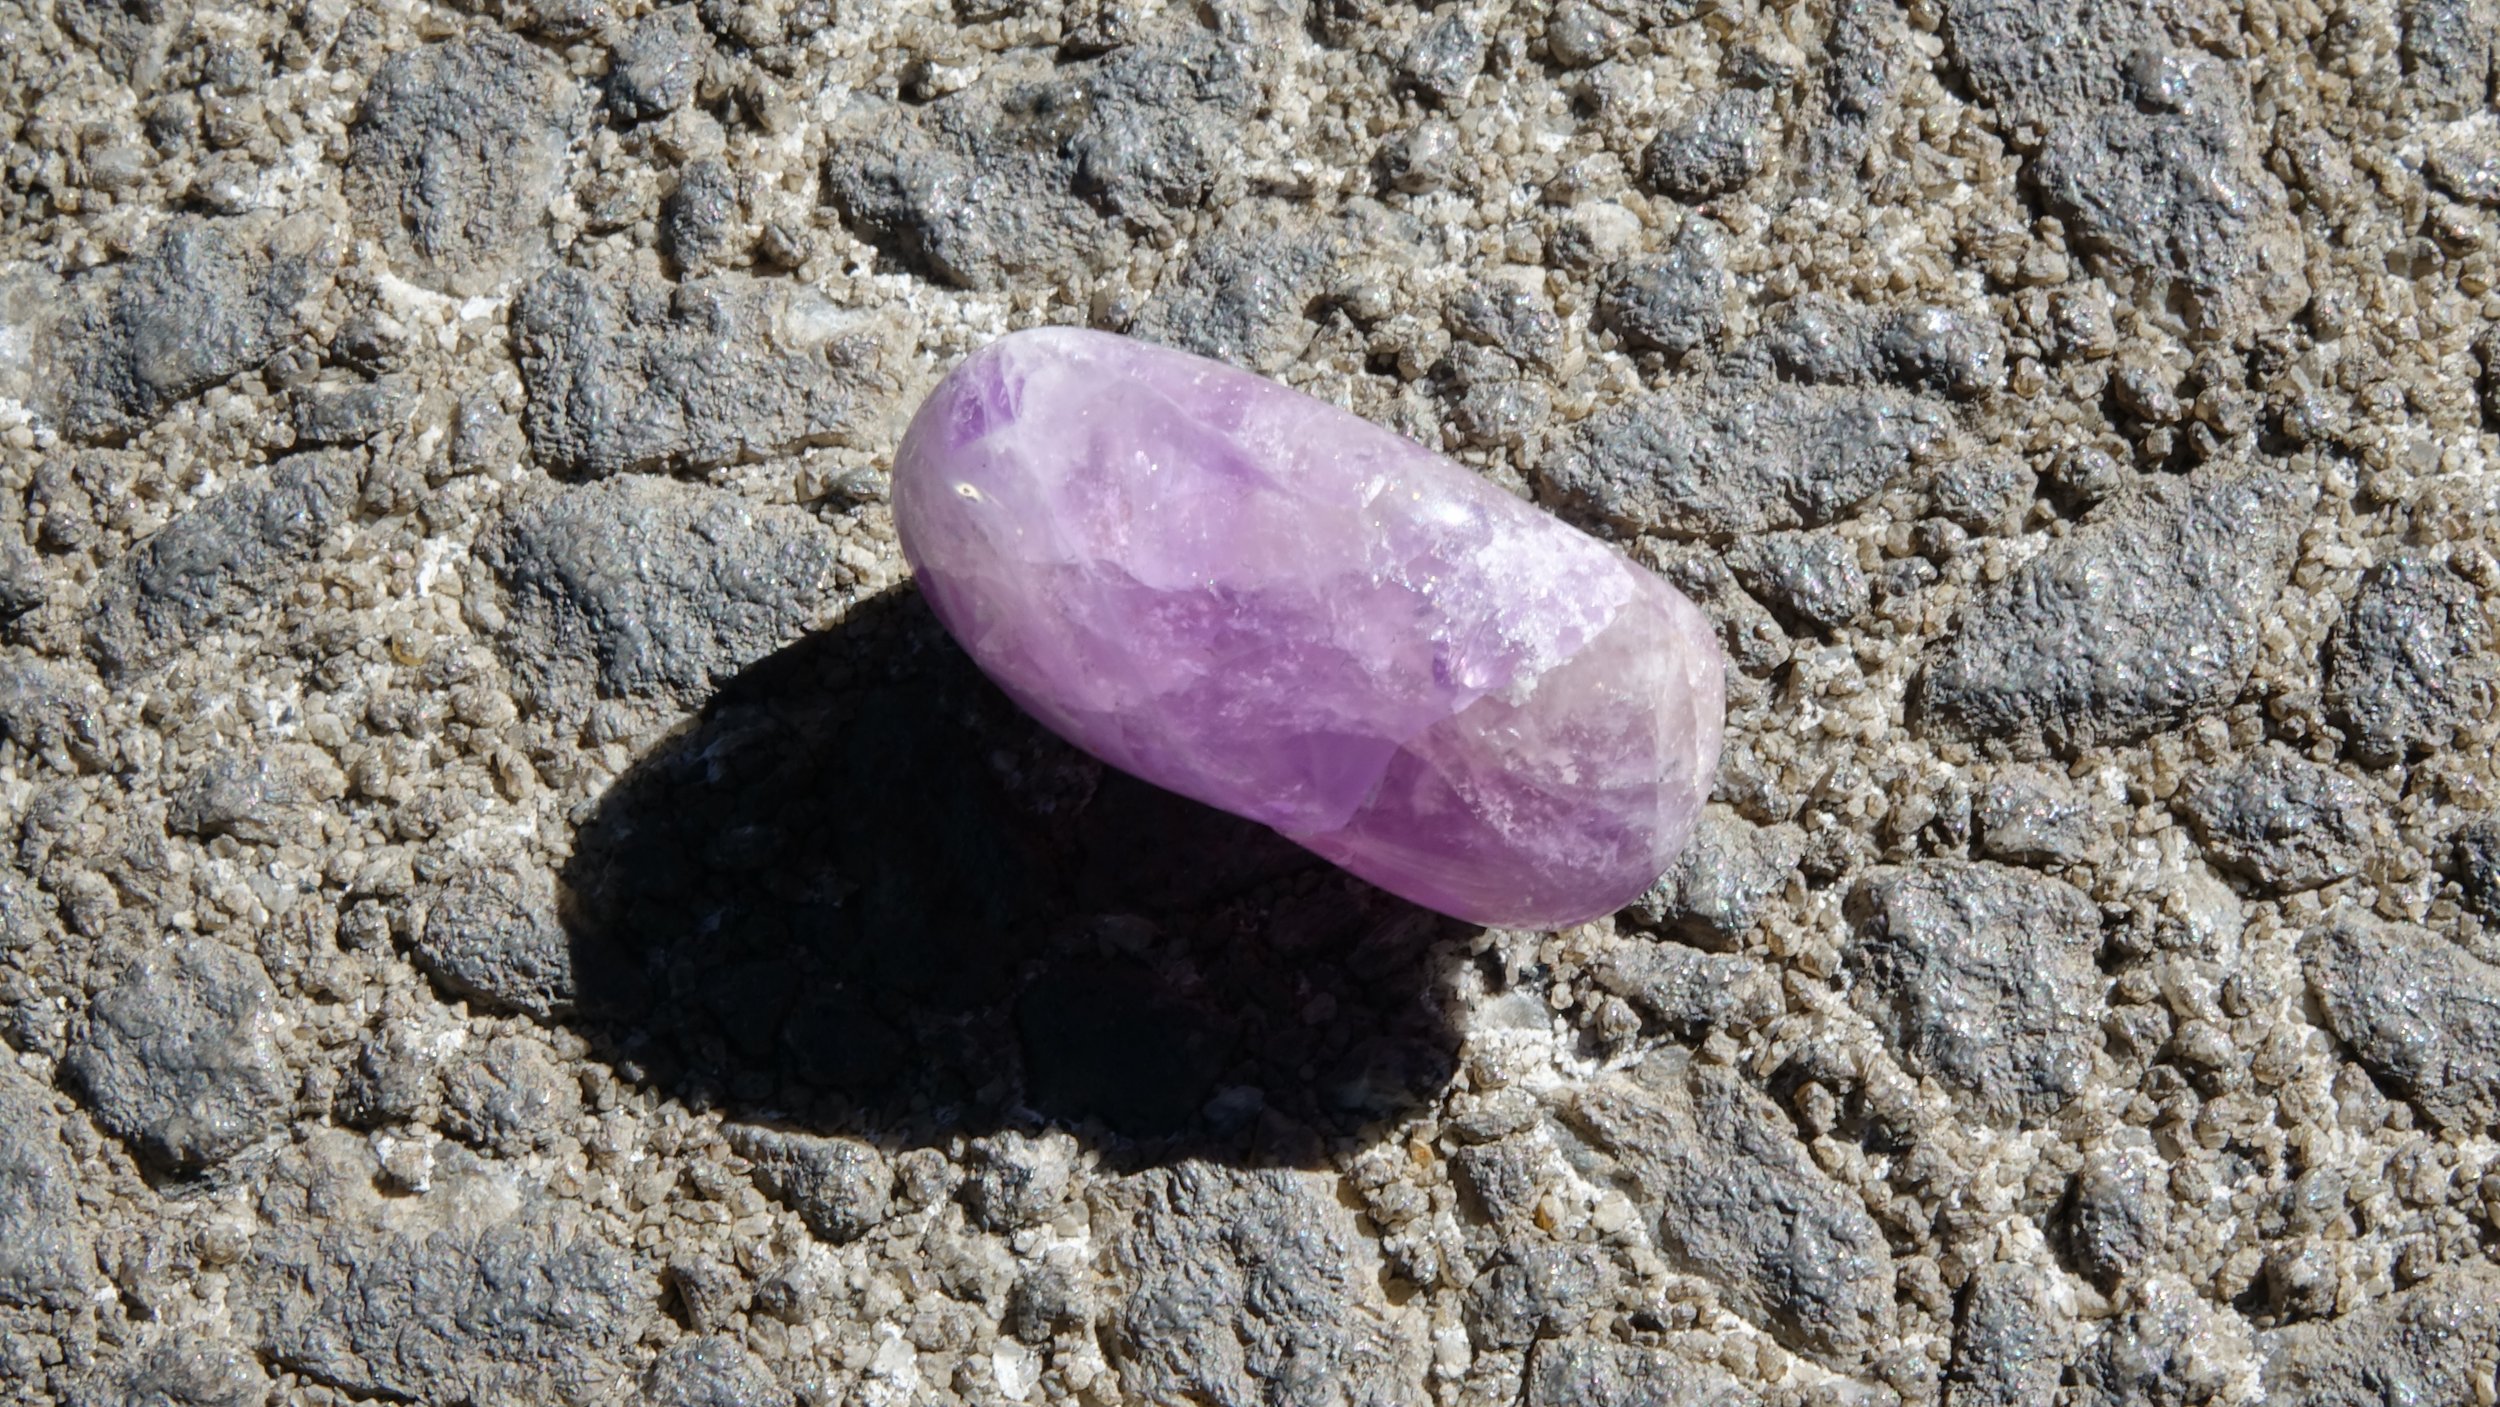

Rock Material Reference Options
Project 1: Lighting CG Objects through Compositing
Week 3
Update #2
Final Submission - Plan to resubmit
Critique Notes: key light is too strong, specularity on the volleyball is too weak, saturation is a bit too high, shadow cast doesn’t look close enough to reference.
Update #1
VB Rough Render Test
Week 2
Update #2
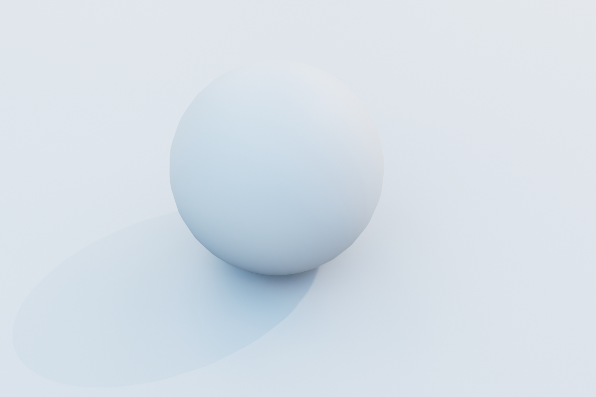
This week I worked on getting my Nuke file set up and improving the lighting of my scene. Based on the comparison below I know I need to cool down the light, since it is appearing very yellow on the 100% white ball, and in the reference it has more of a blue color.
Most Recent Lighting Progress on White Ball
Nuke Node Tree
Chosen 3D Model Source Image
Update #1
Reference Image
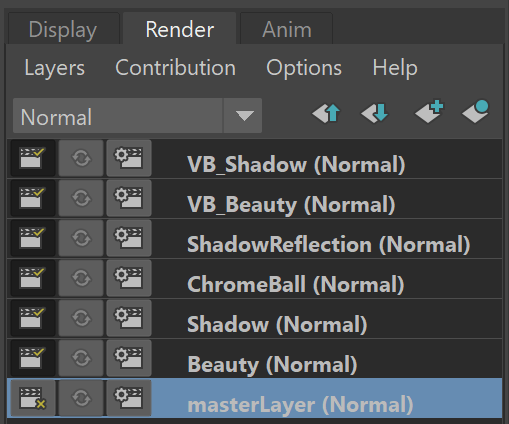
Maya Render Layers
Most Recent Lighting with Object ( basic shader )
This week I fixed my Arnold licensing issues and got started on the lighting setup and creating separate render layers for Beauty and Shadow.
Beauty Layer Progress - need to isolate grey ball
Shadow Layer Progress - need to isolate shadow
Week 1
Update #2
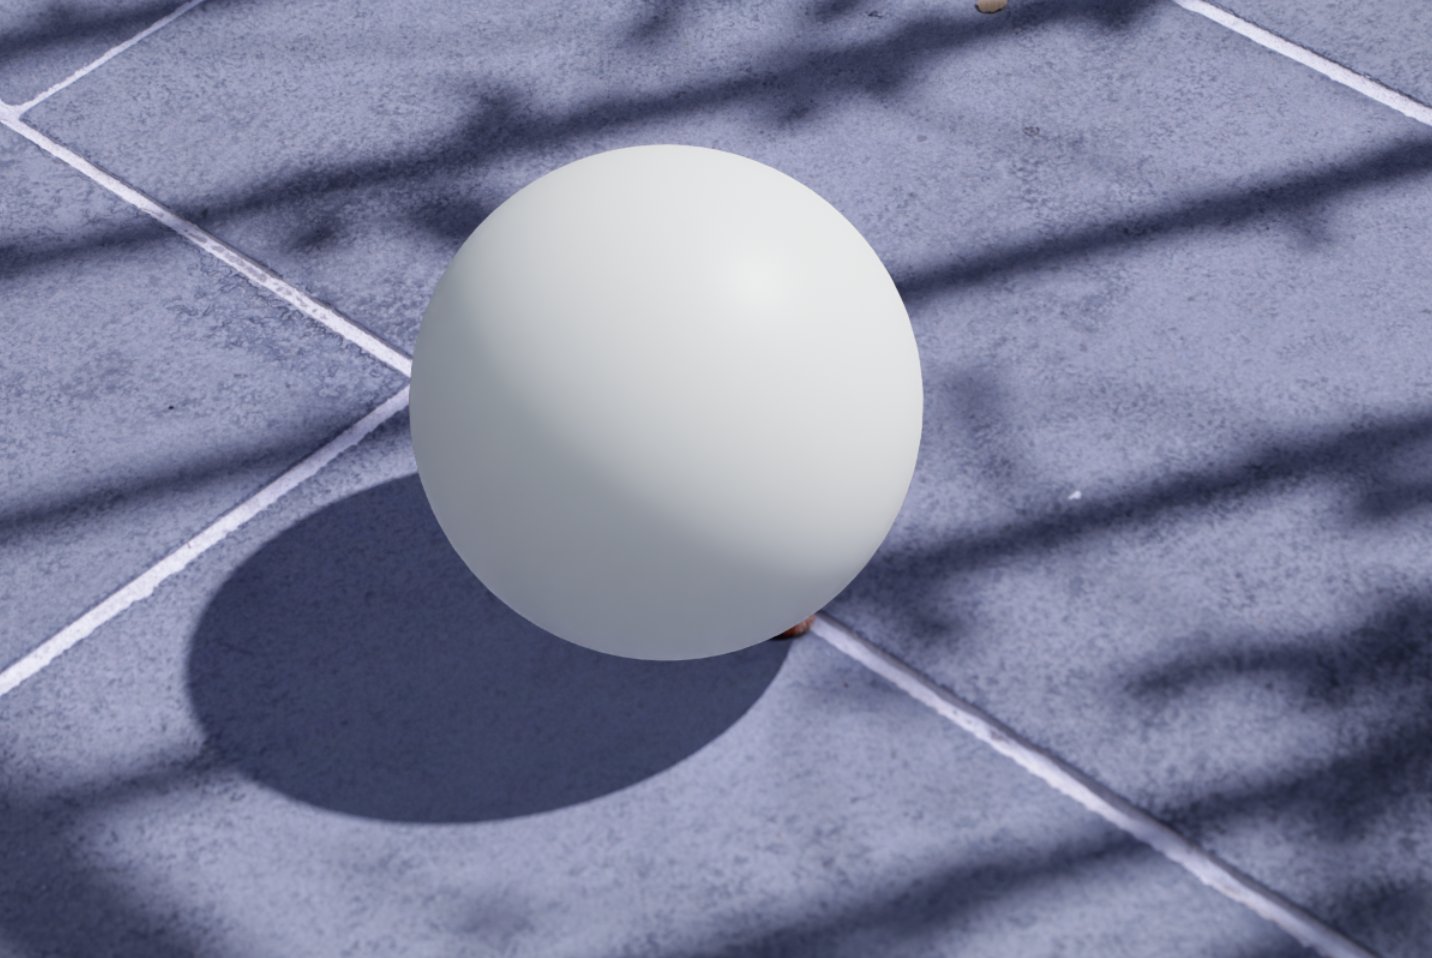
I have set up my chrome ball and white sphere accordingly in my scene, but when I tried to set up materials and lighting to do my first render test my Maya would constantly crash. I realized it is because of the error below that I get when opening my scene. I am researching to troubleshoot this, and I will get it working soon

Update #1
For the first project, we are required to do a 3D camera match to a background plate and successfully integrate a CG object using rendering and compositing. The object must accurately interact with the lighting in the image, and must roll through a shadowed area and show those lighting changes.
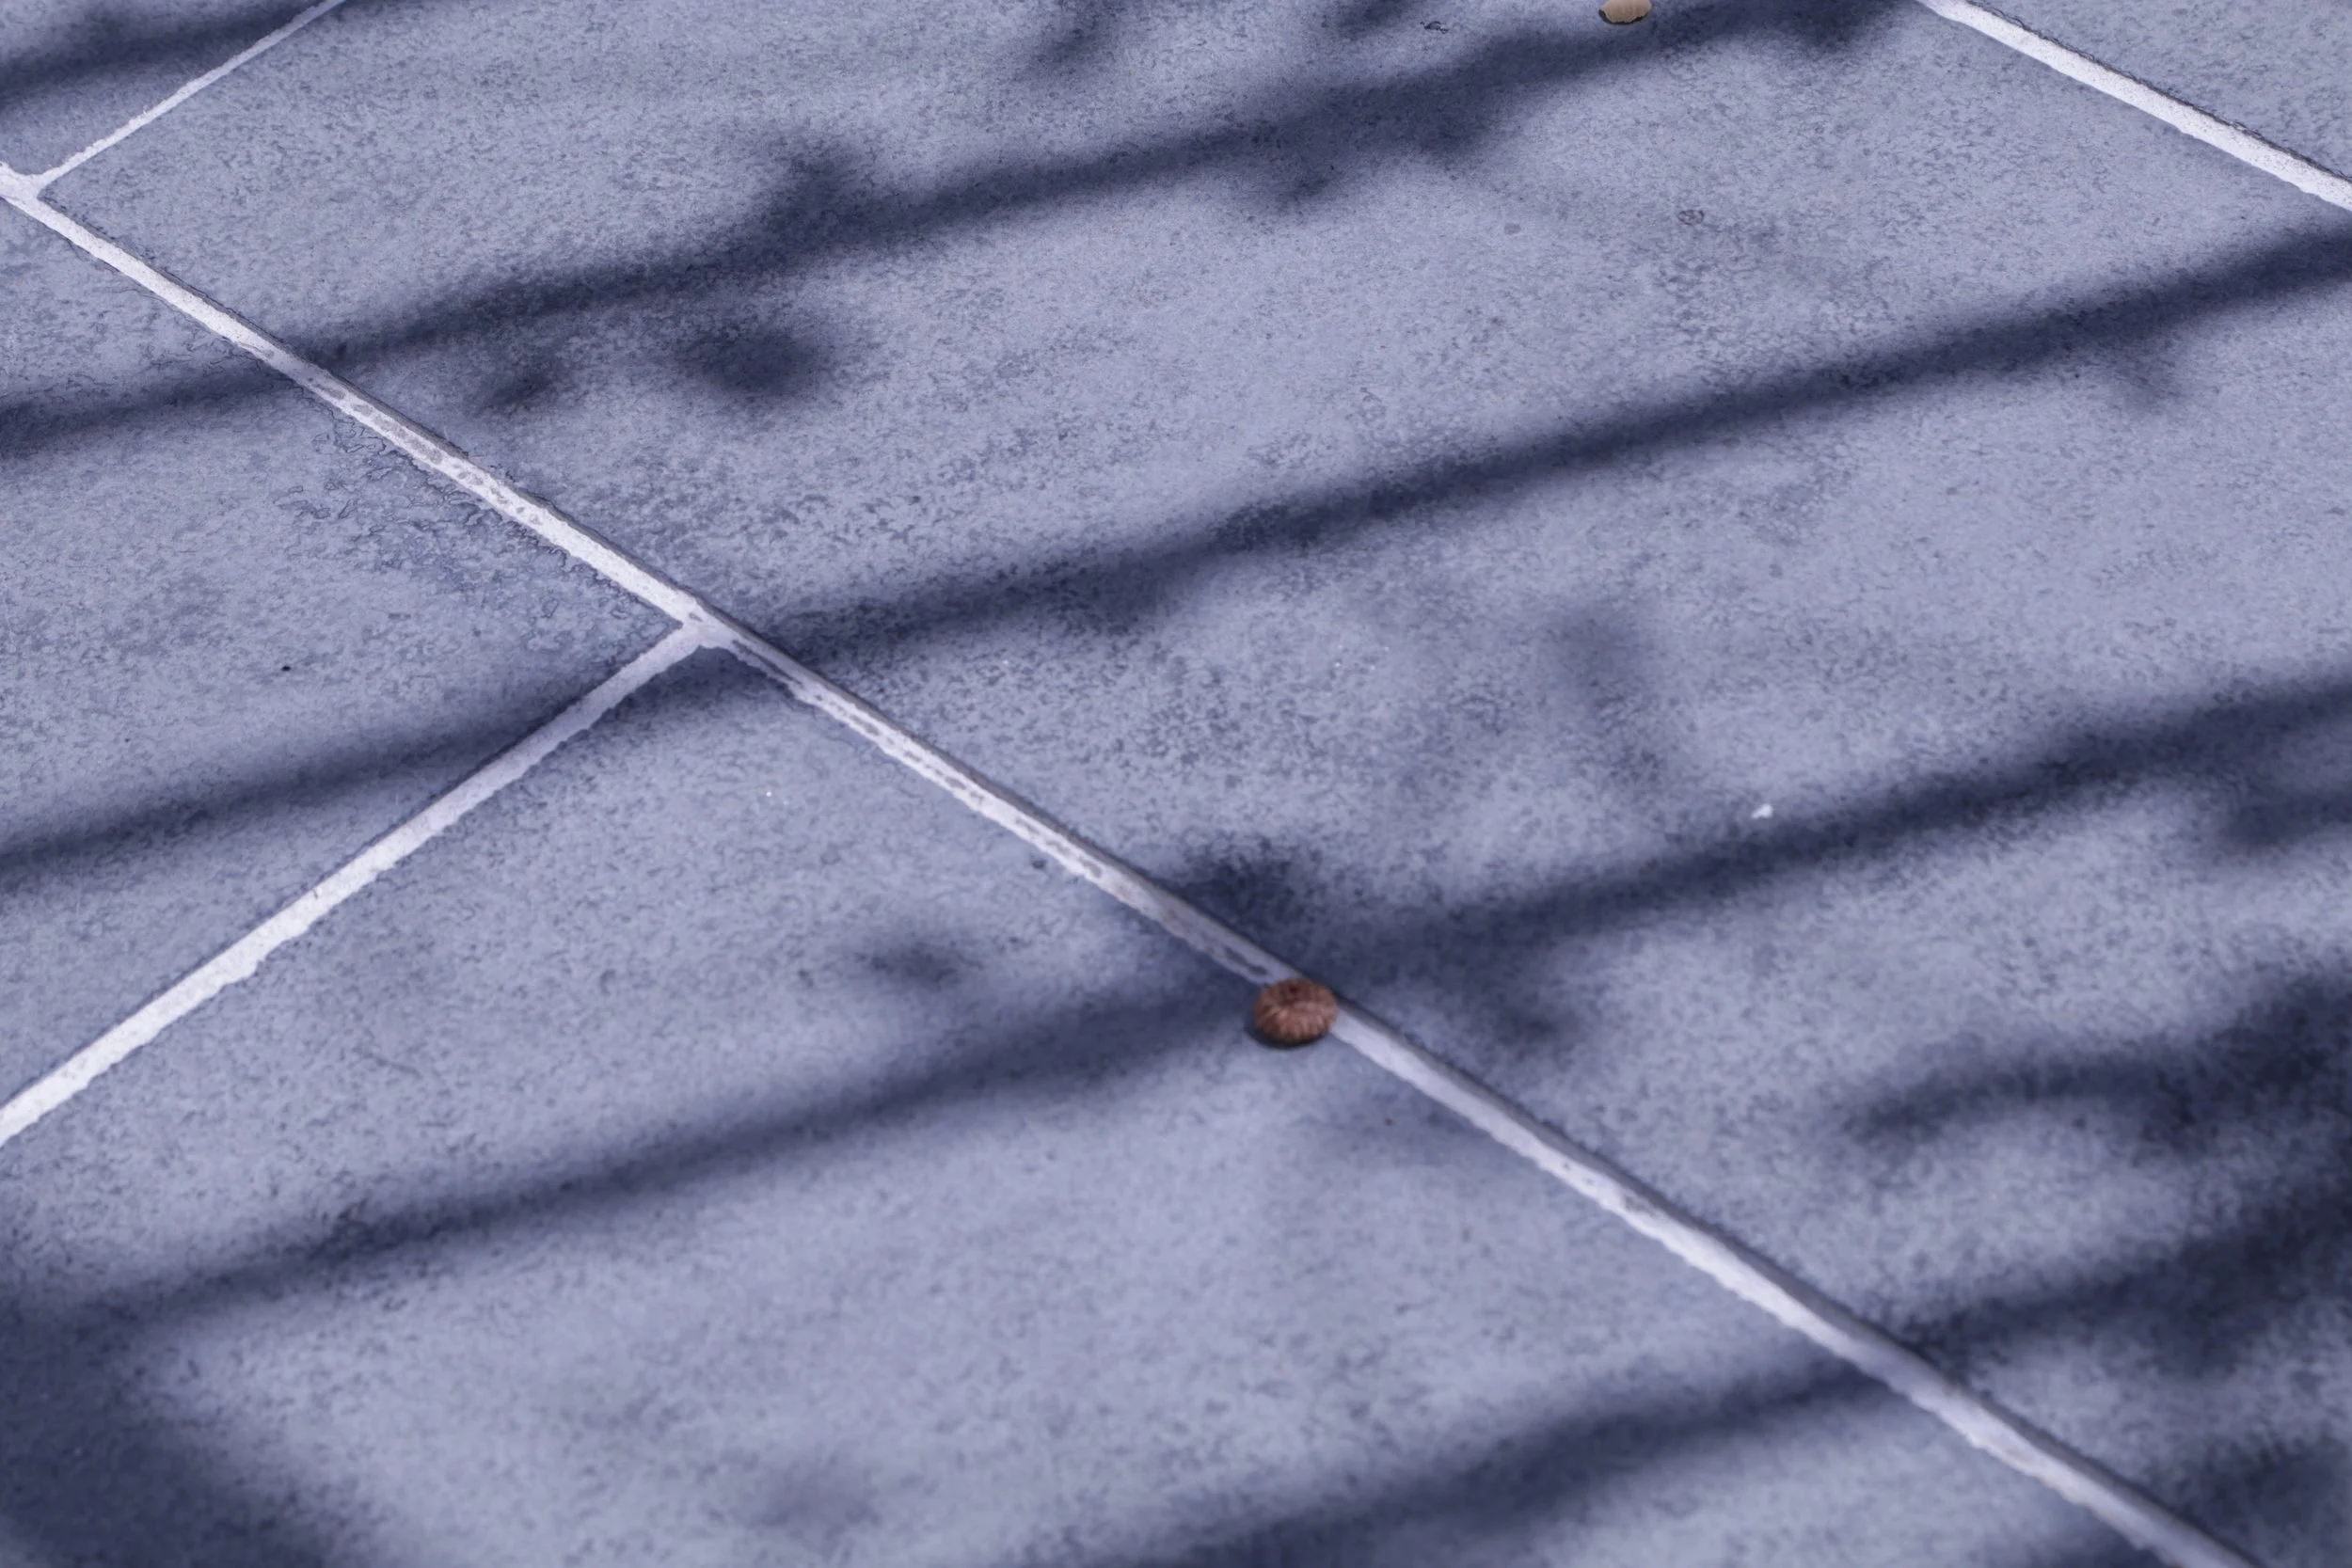
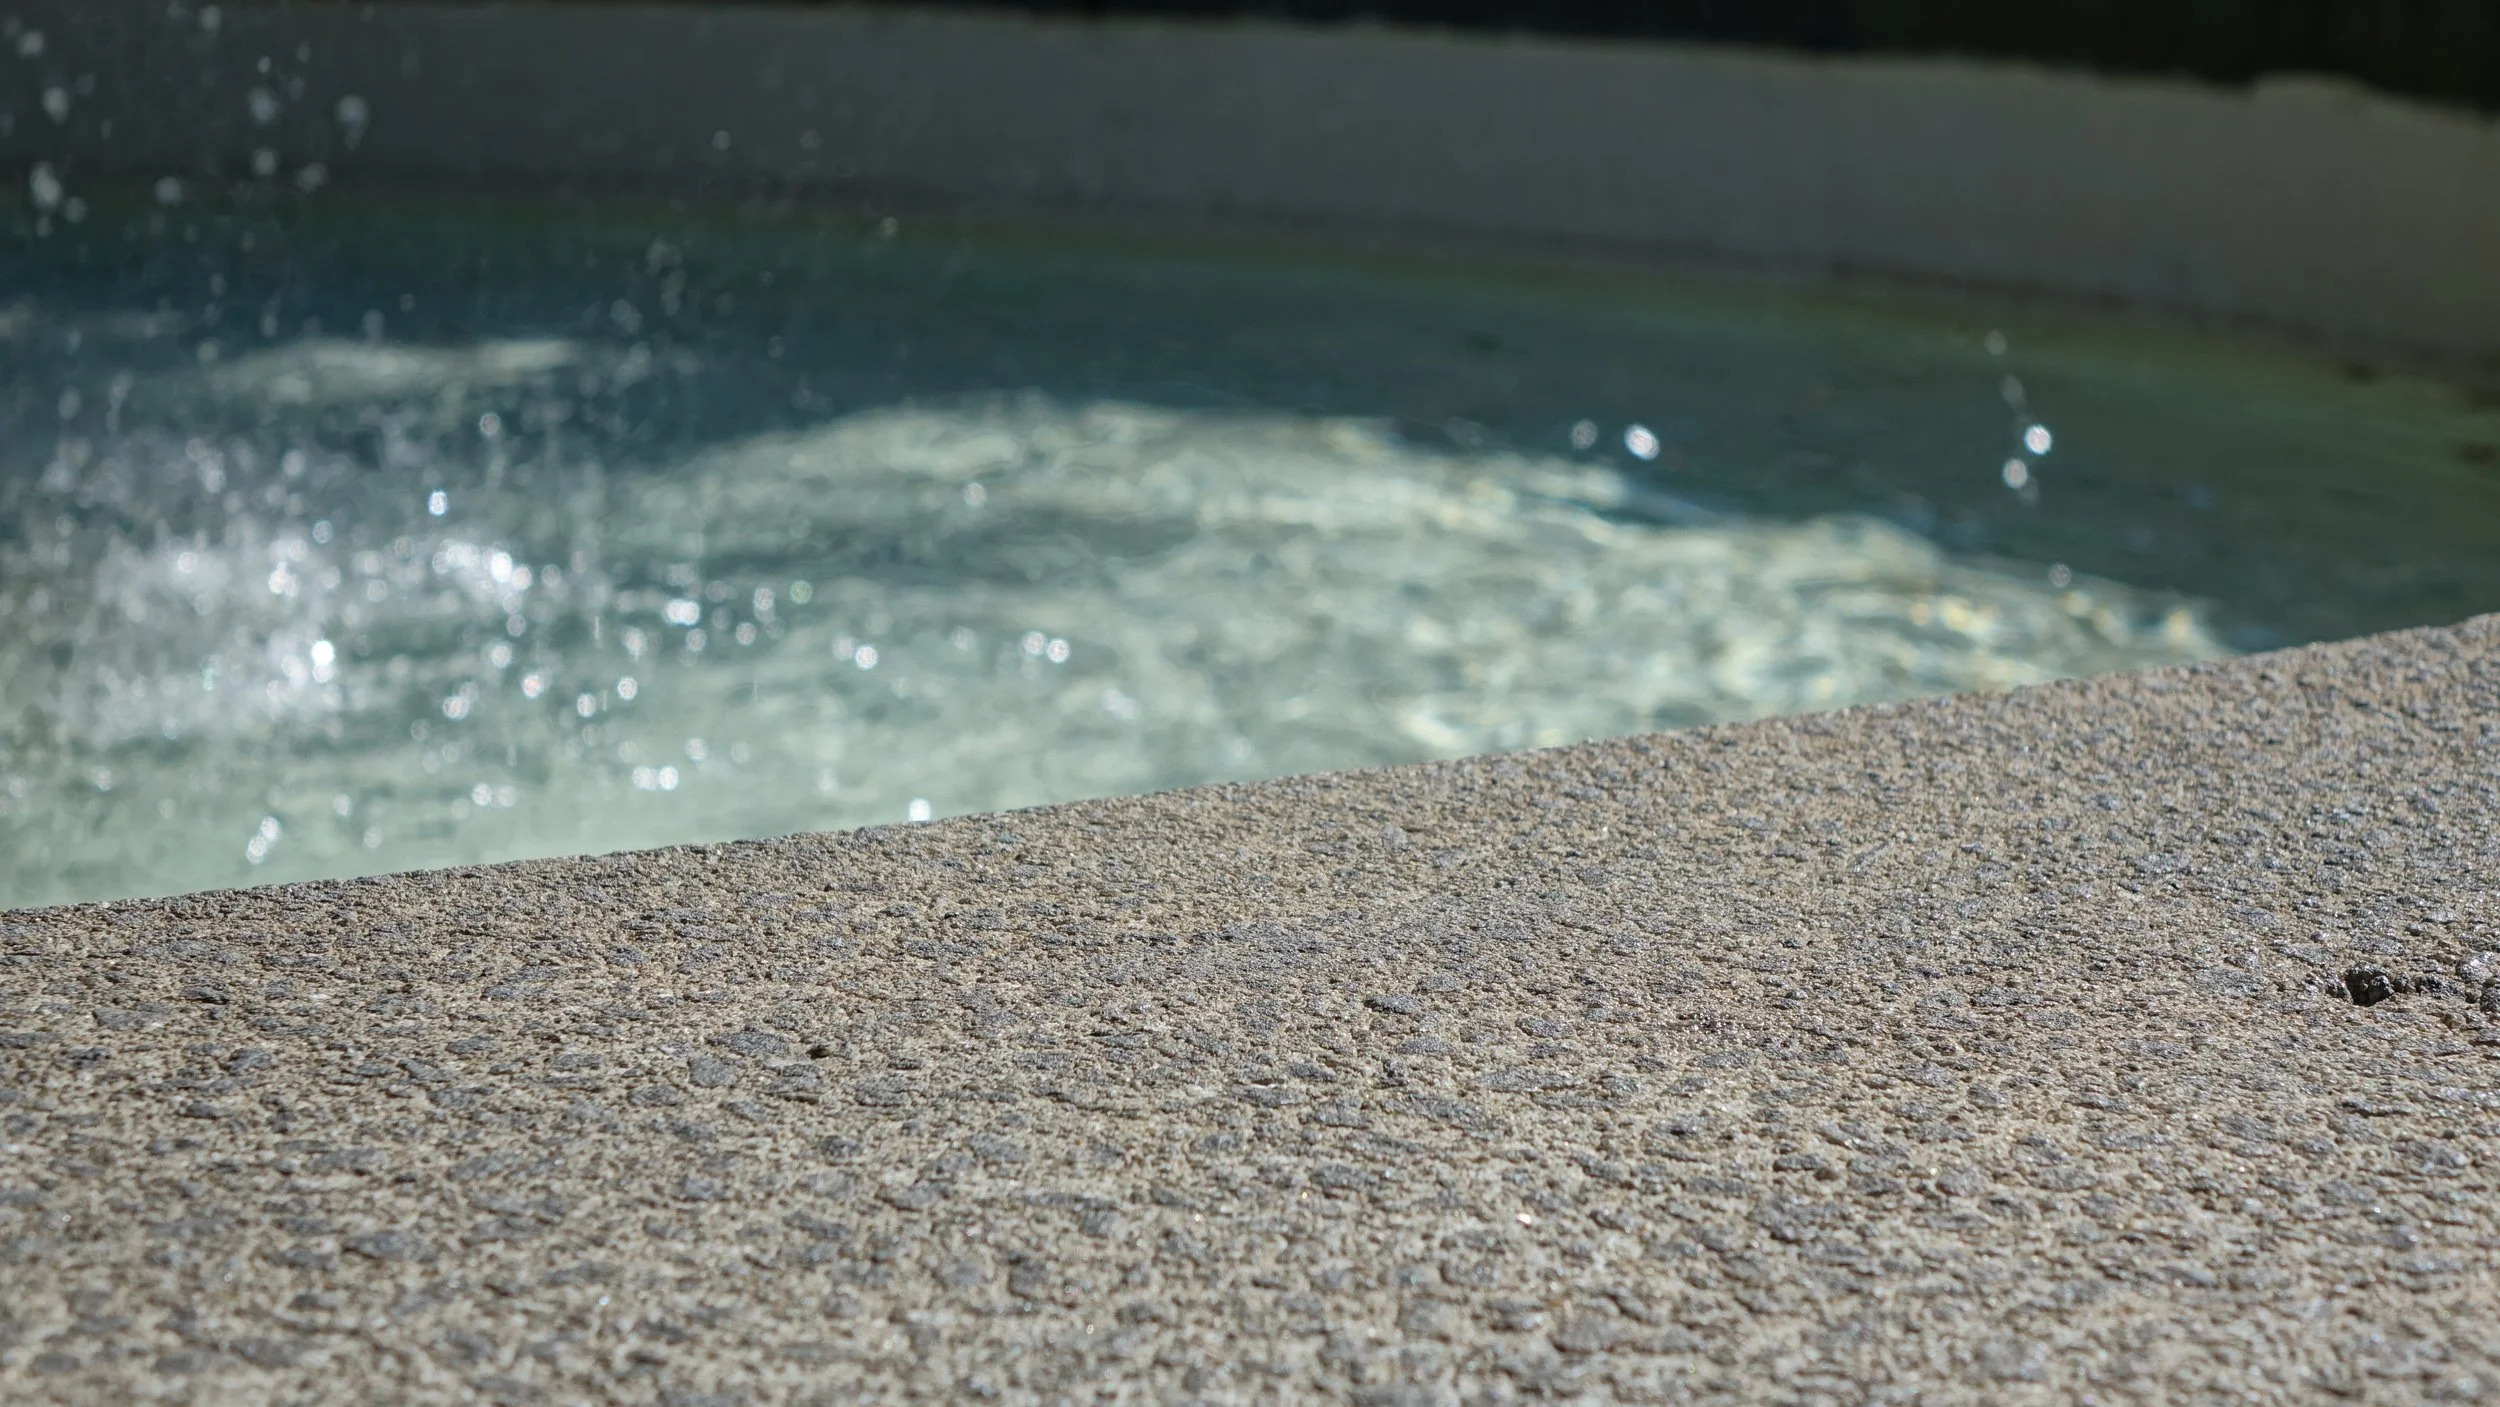
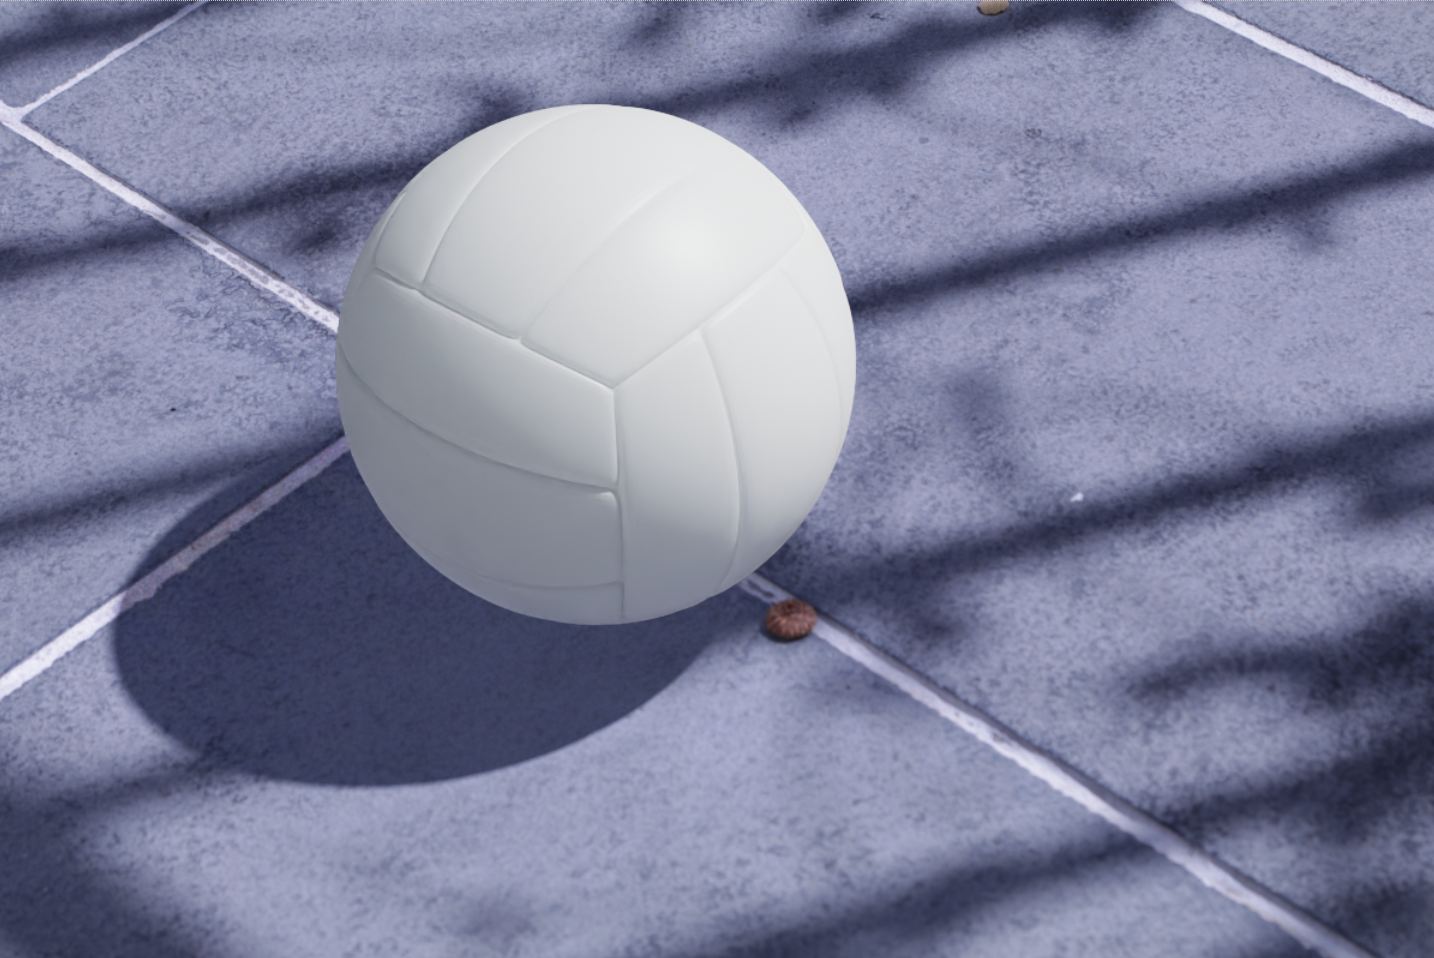
We were given a photo set library to choose from by Professor Gaynor for our reference photos. I chose this photo set of a blue sidewalk with an interesting shadow caused by a nearby fence.
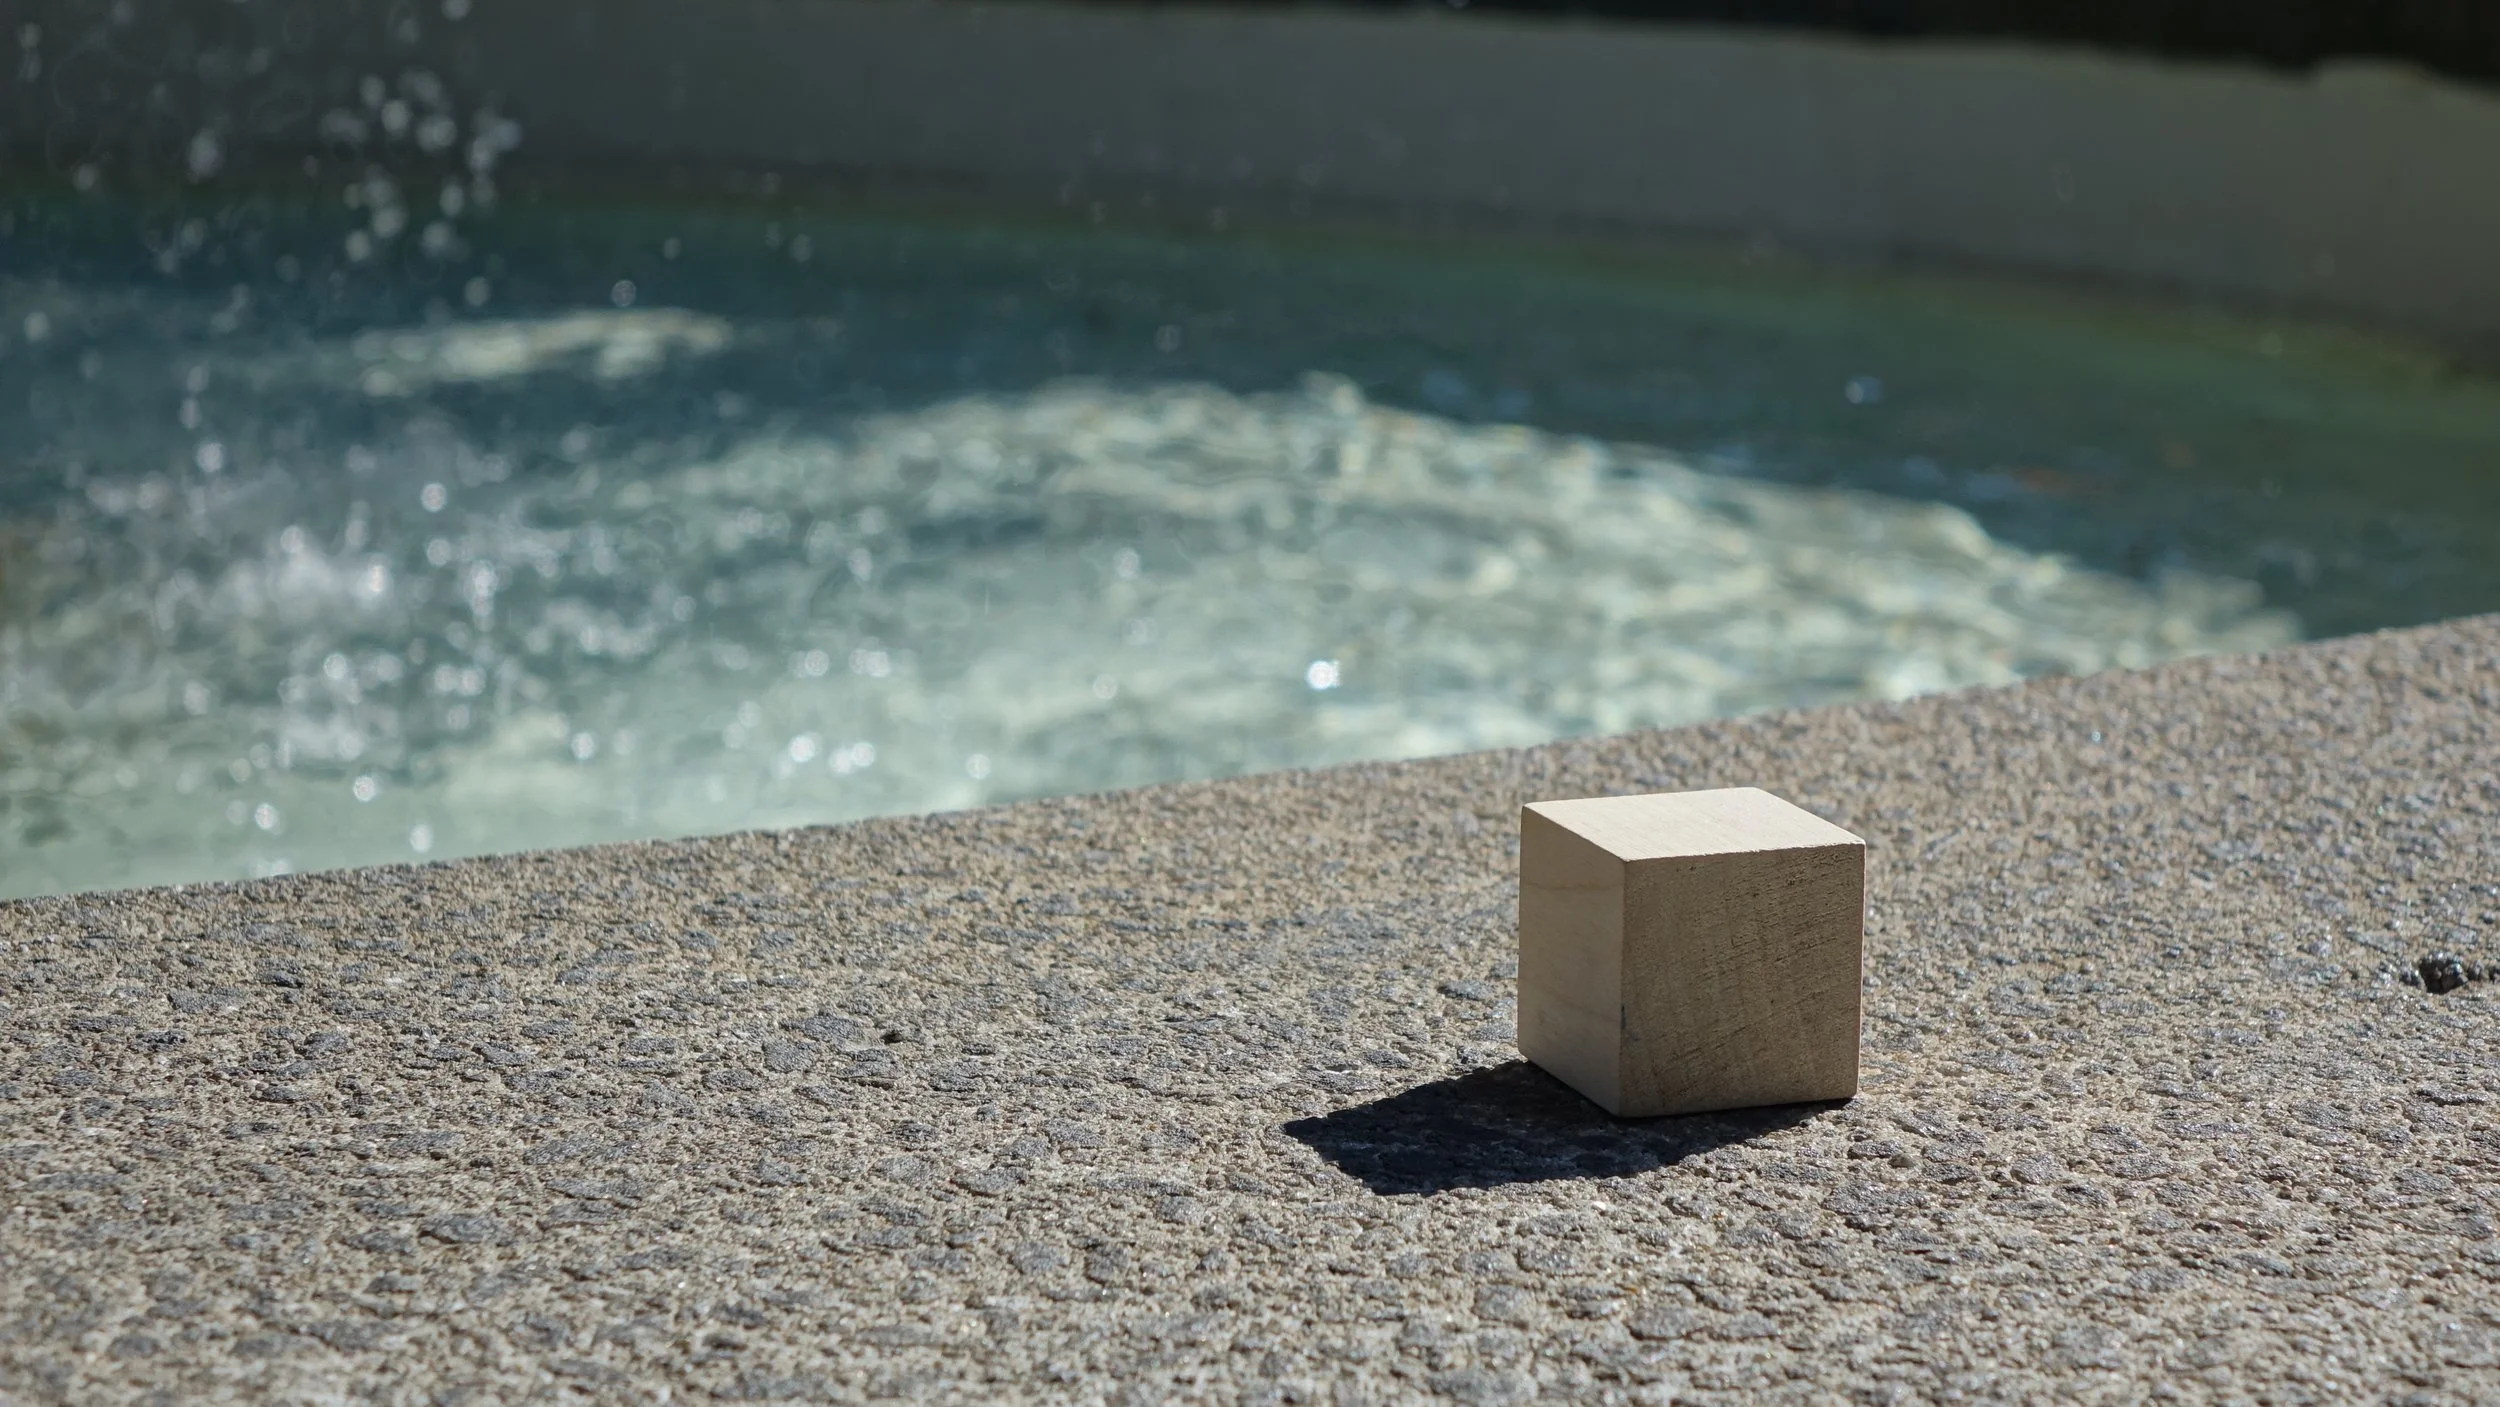
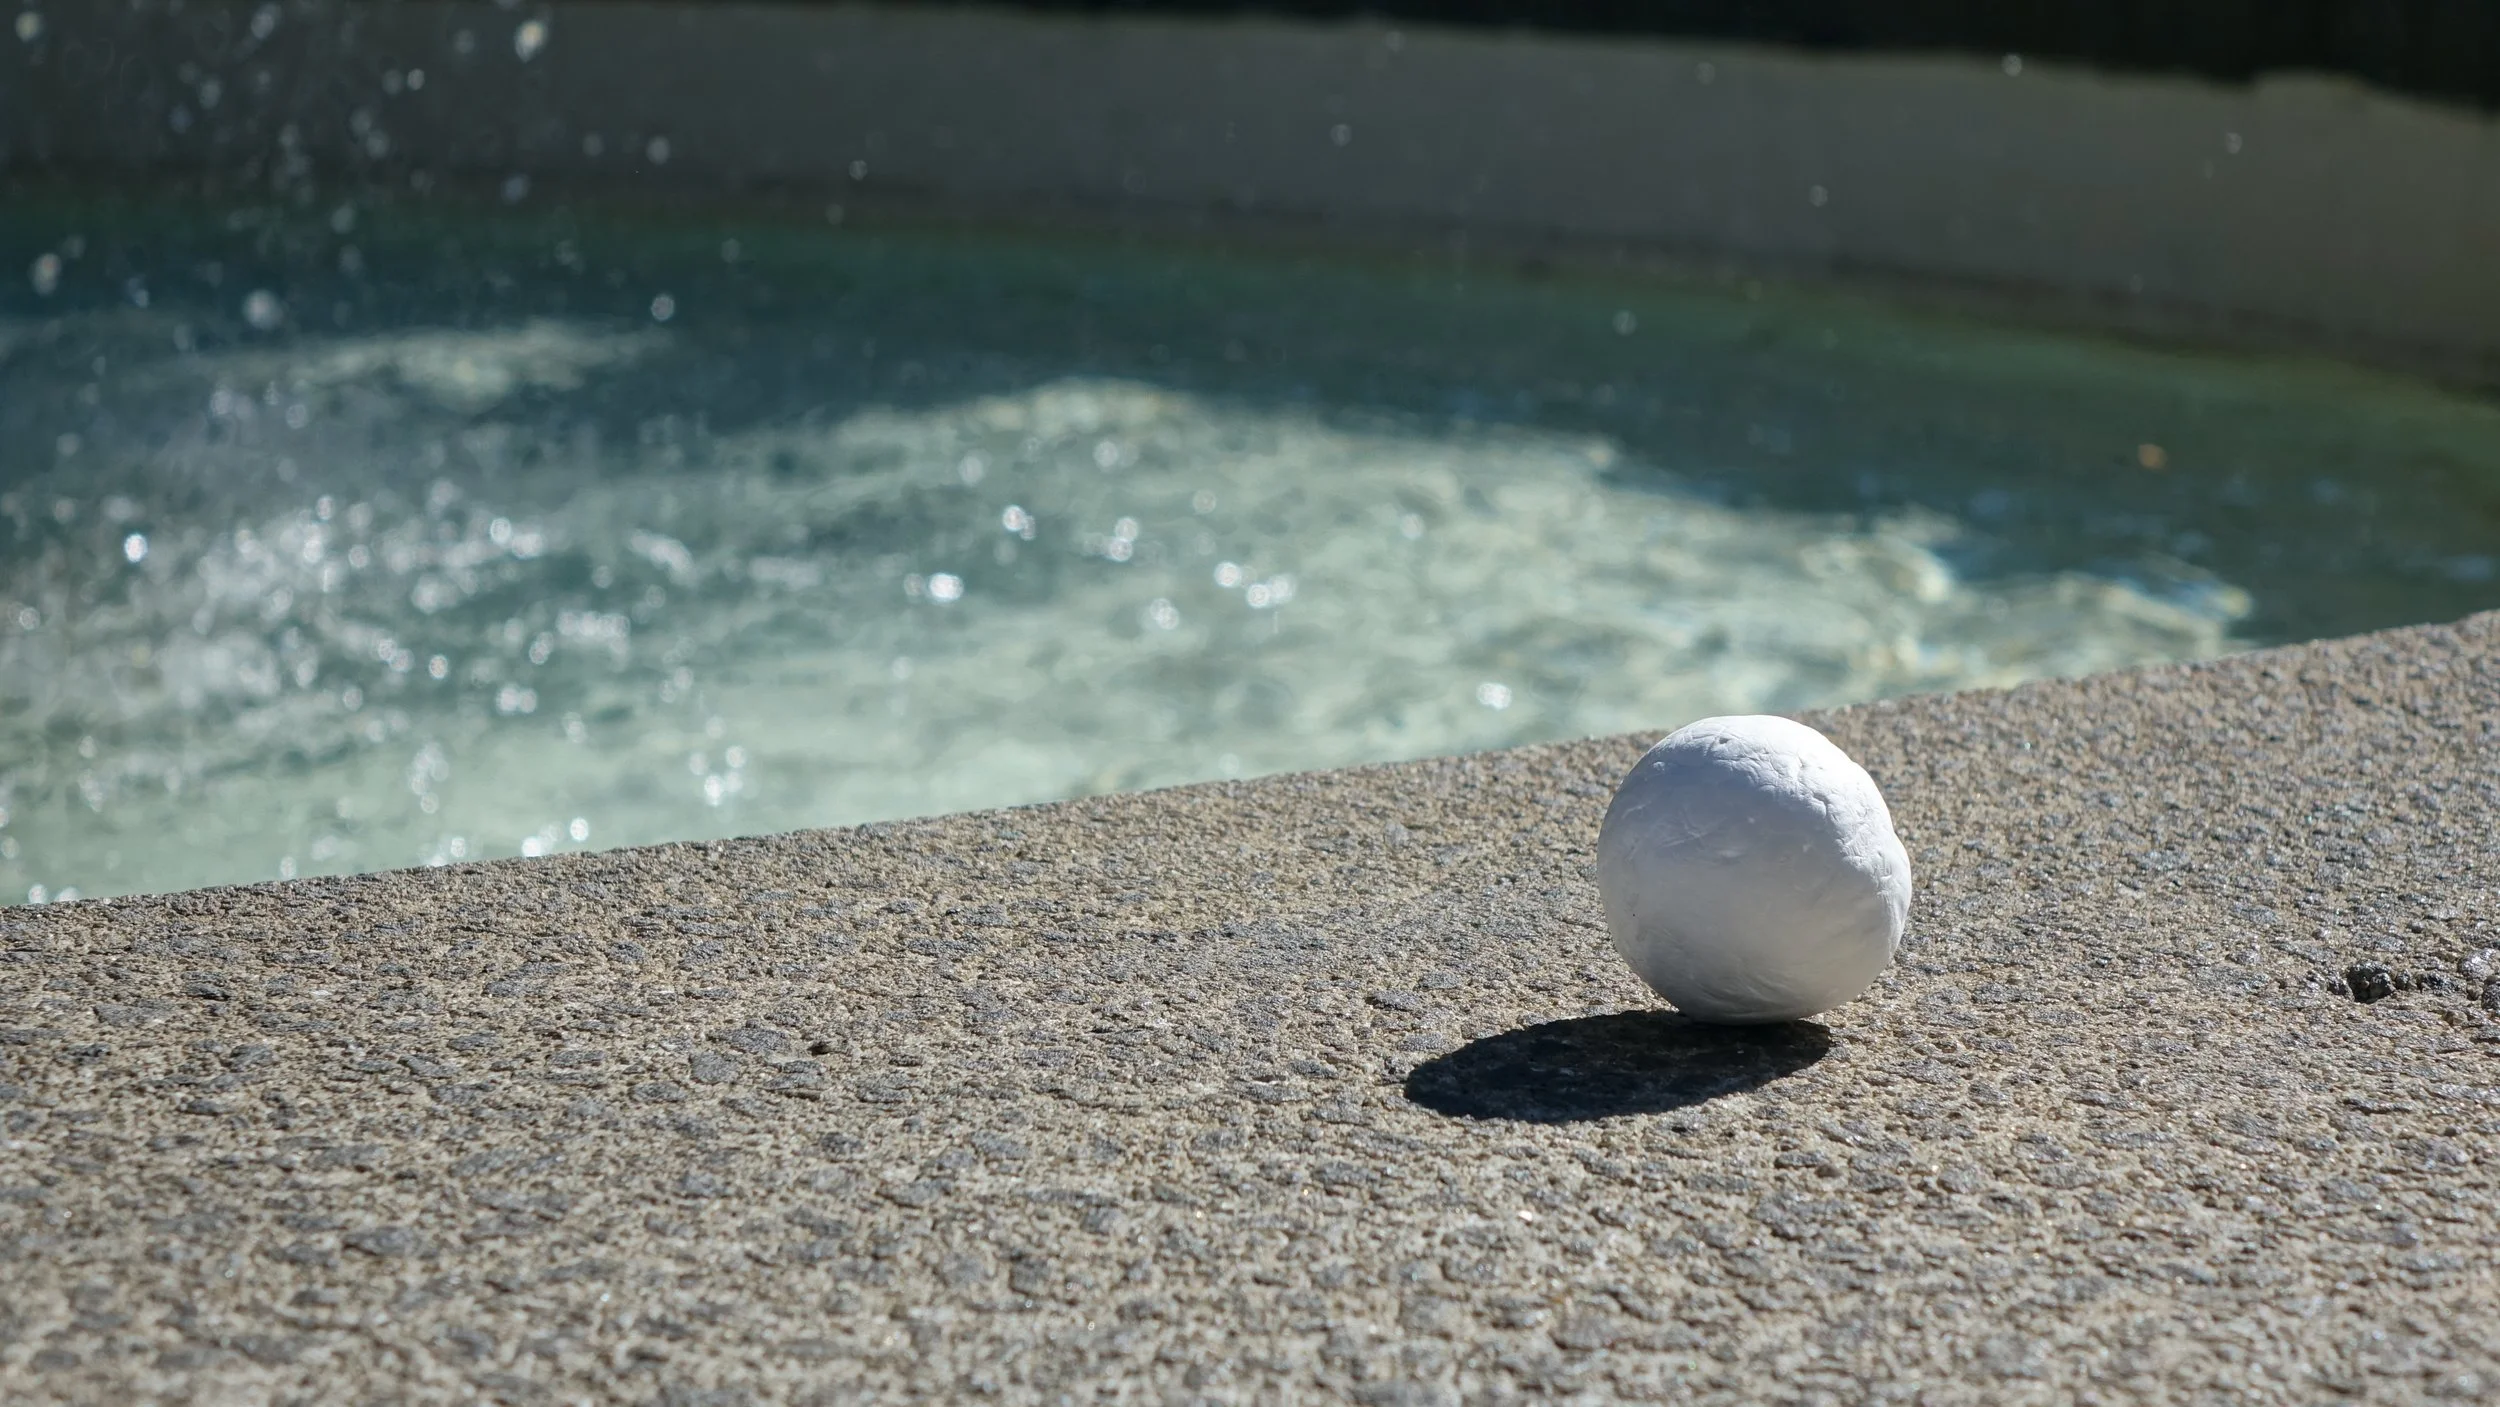
These photos will be used for camera matching (wooden cube) and lighting (white sphere).
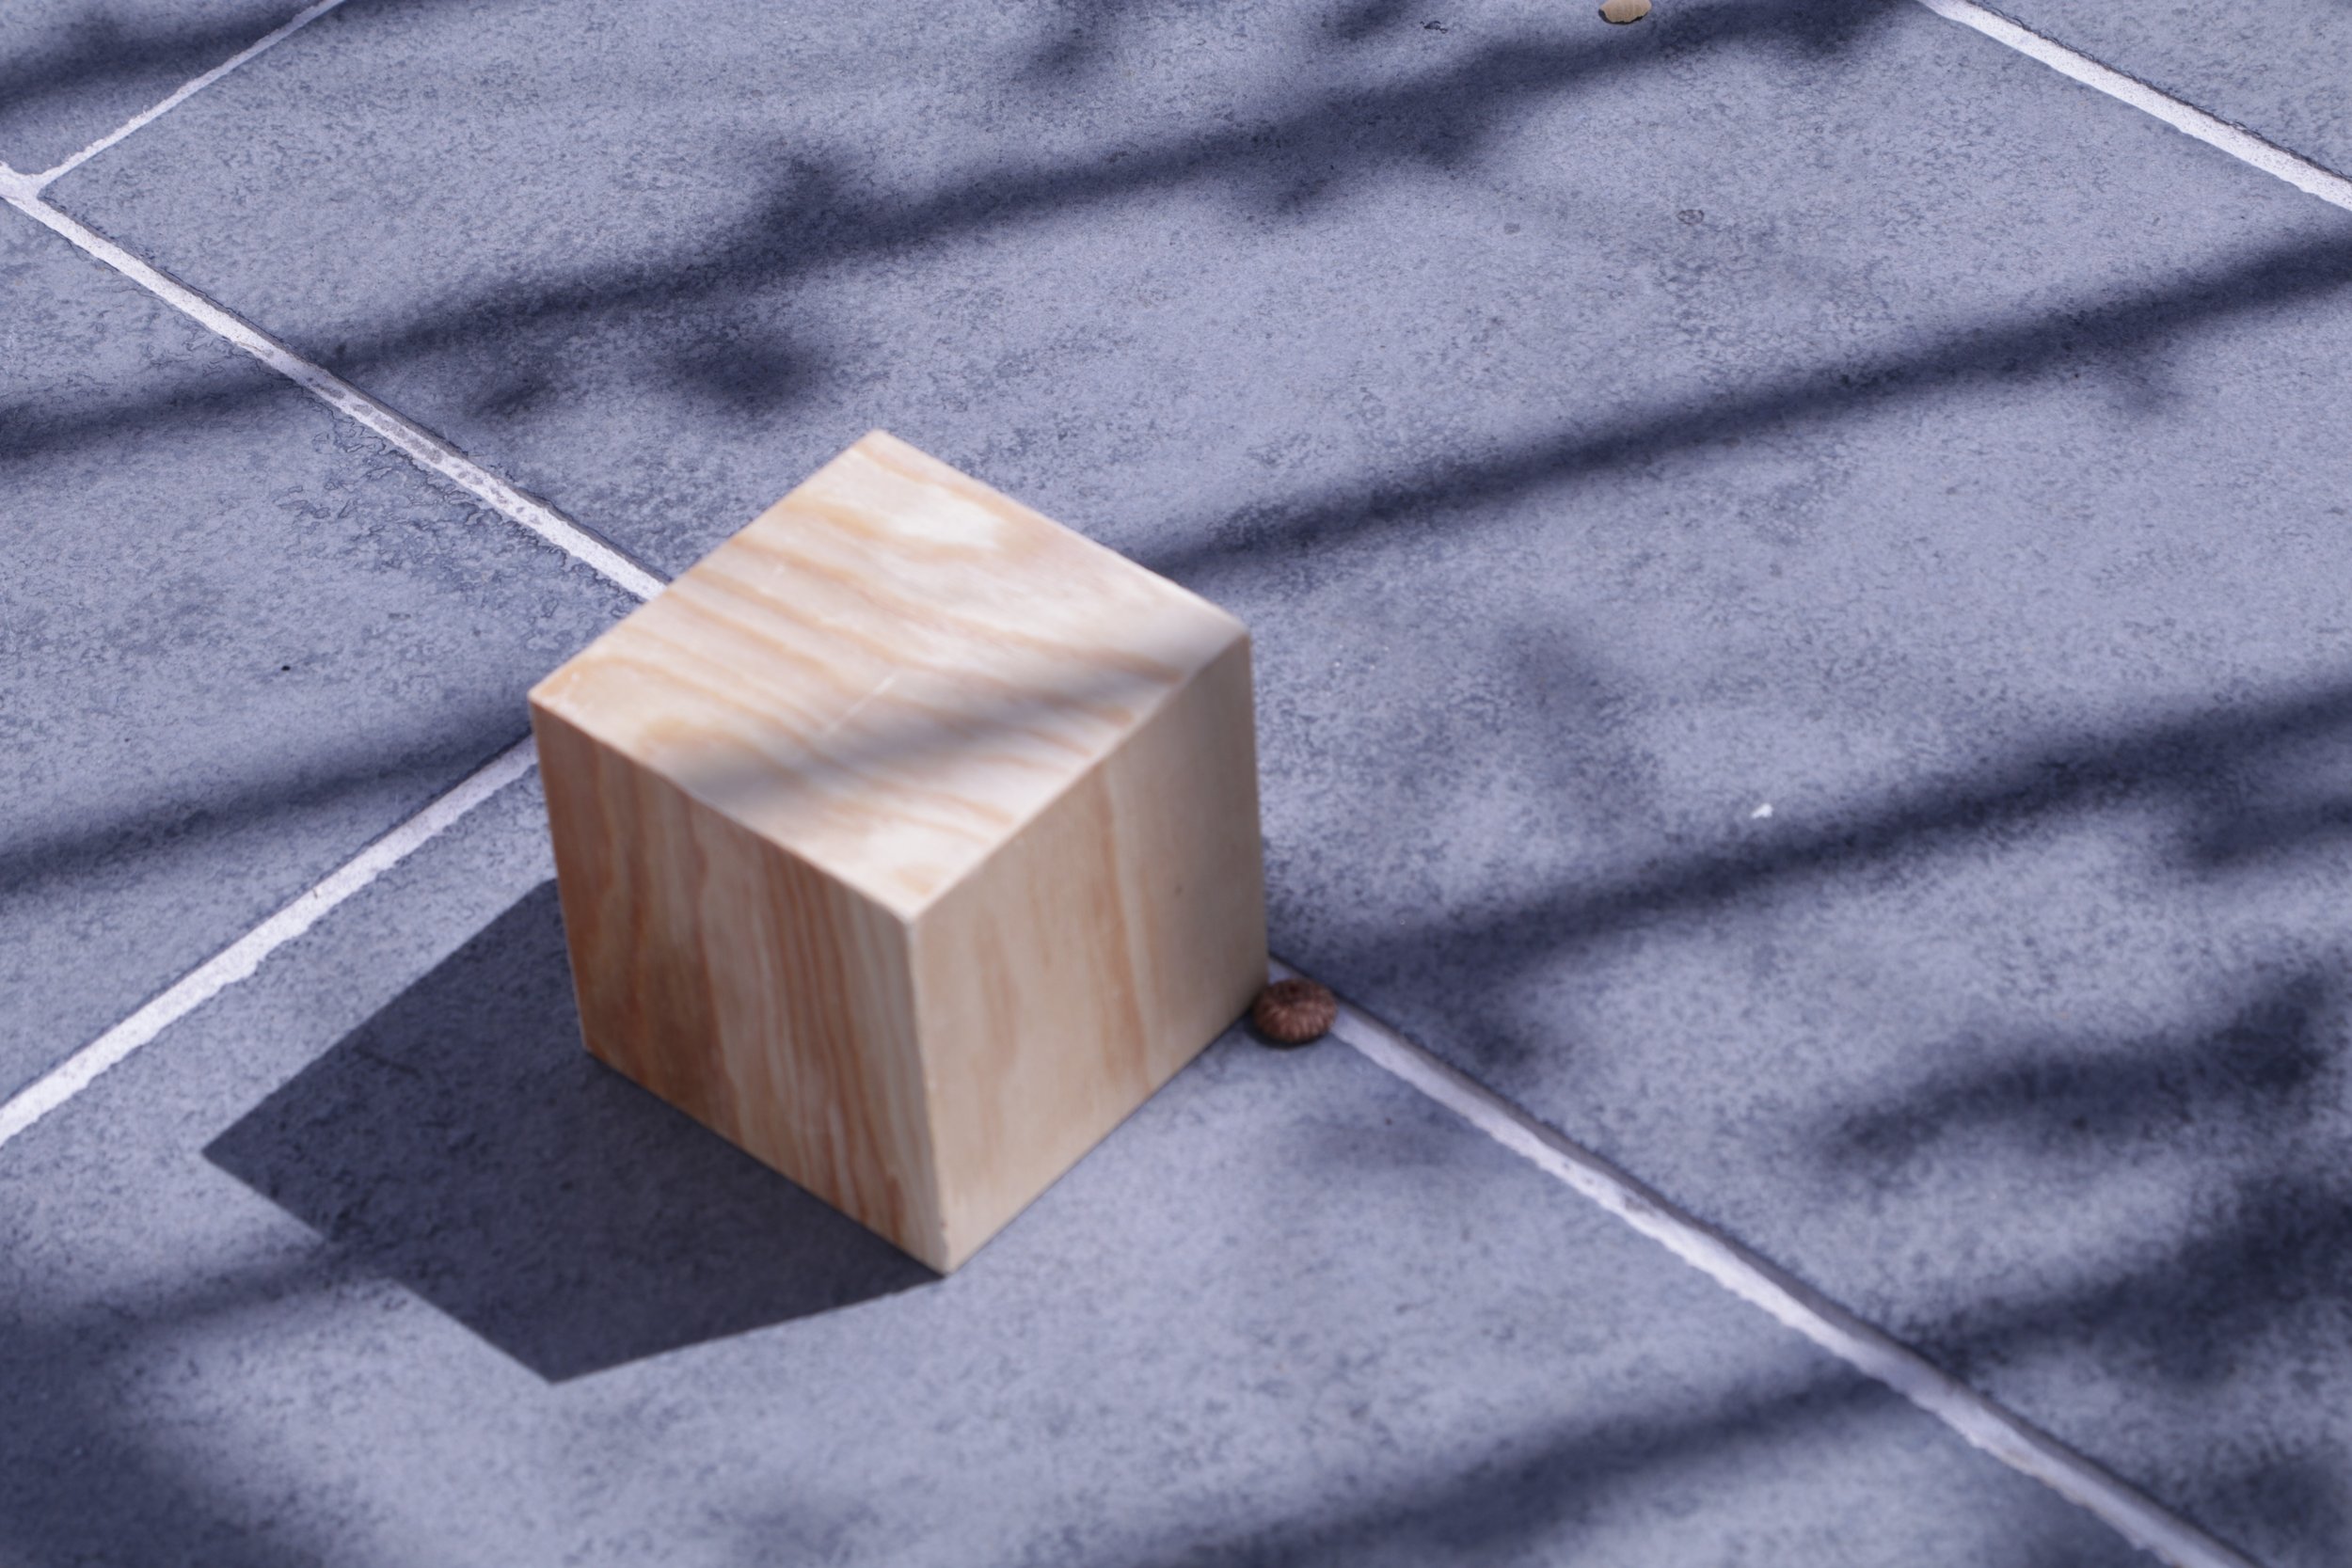
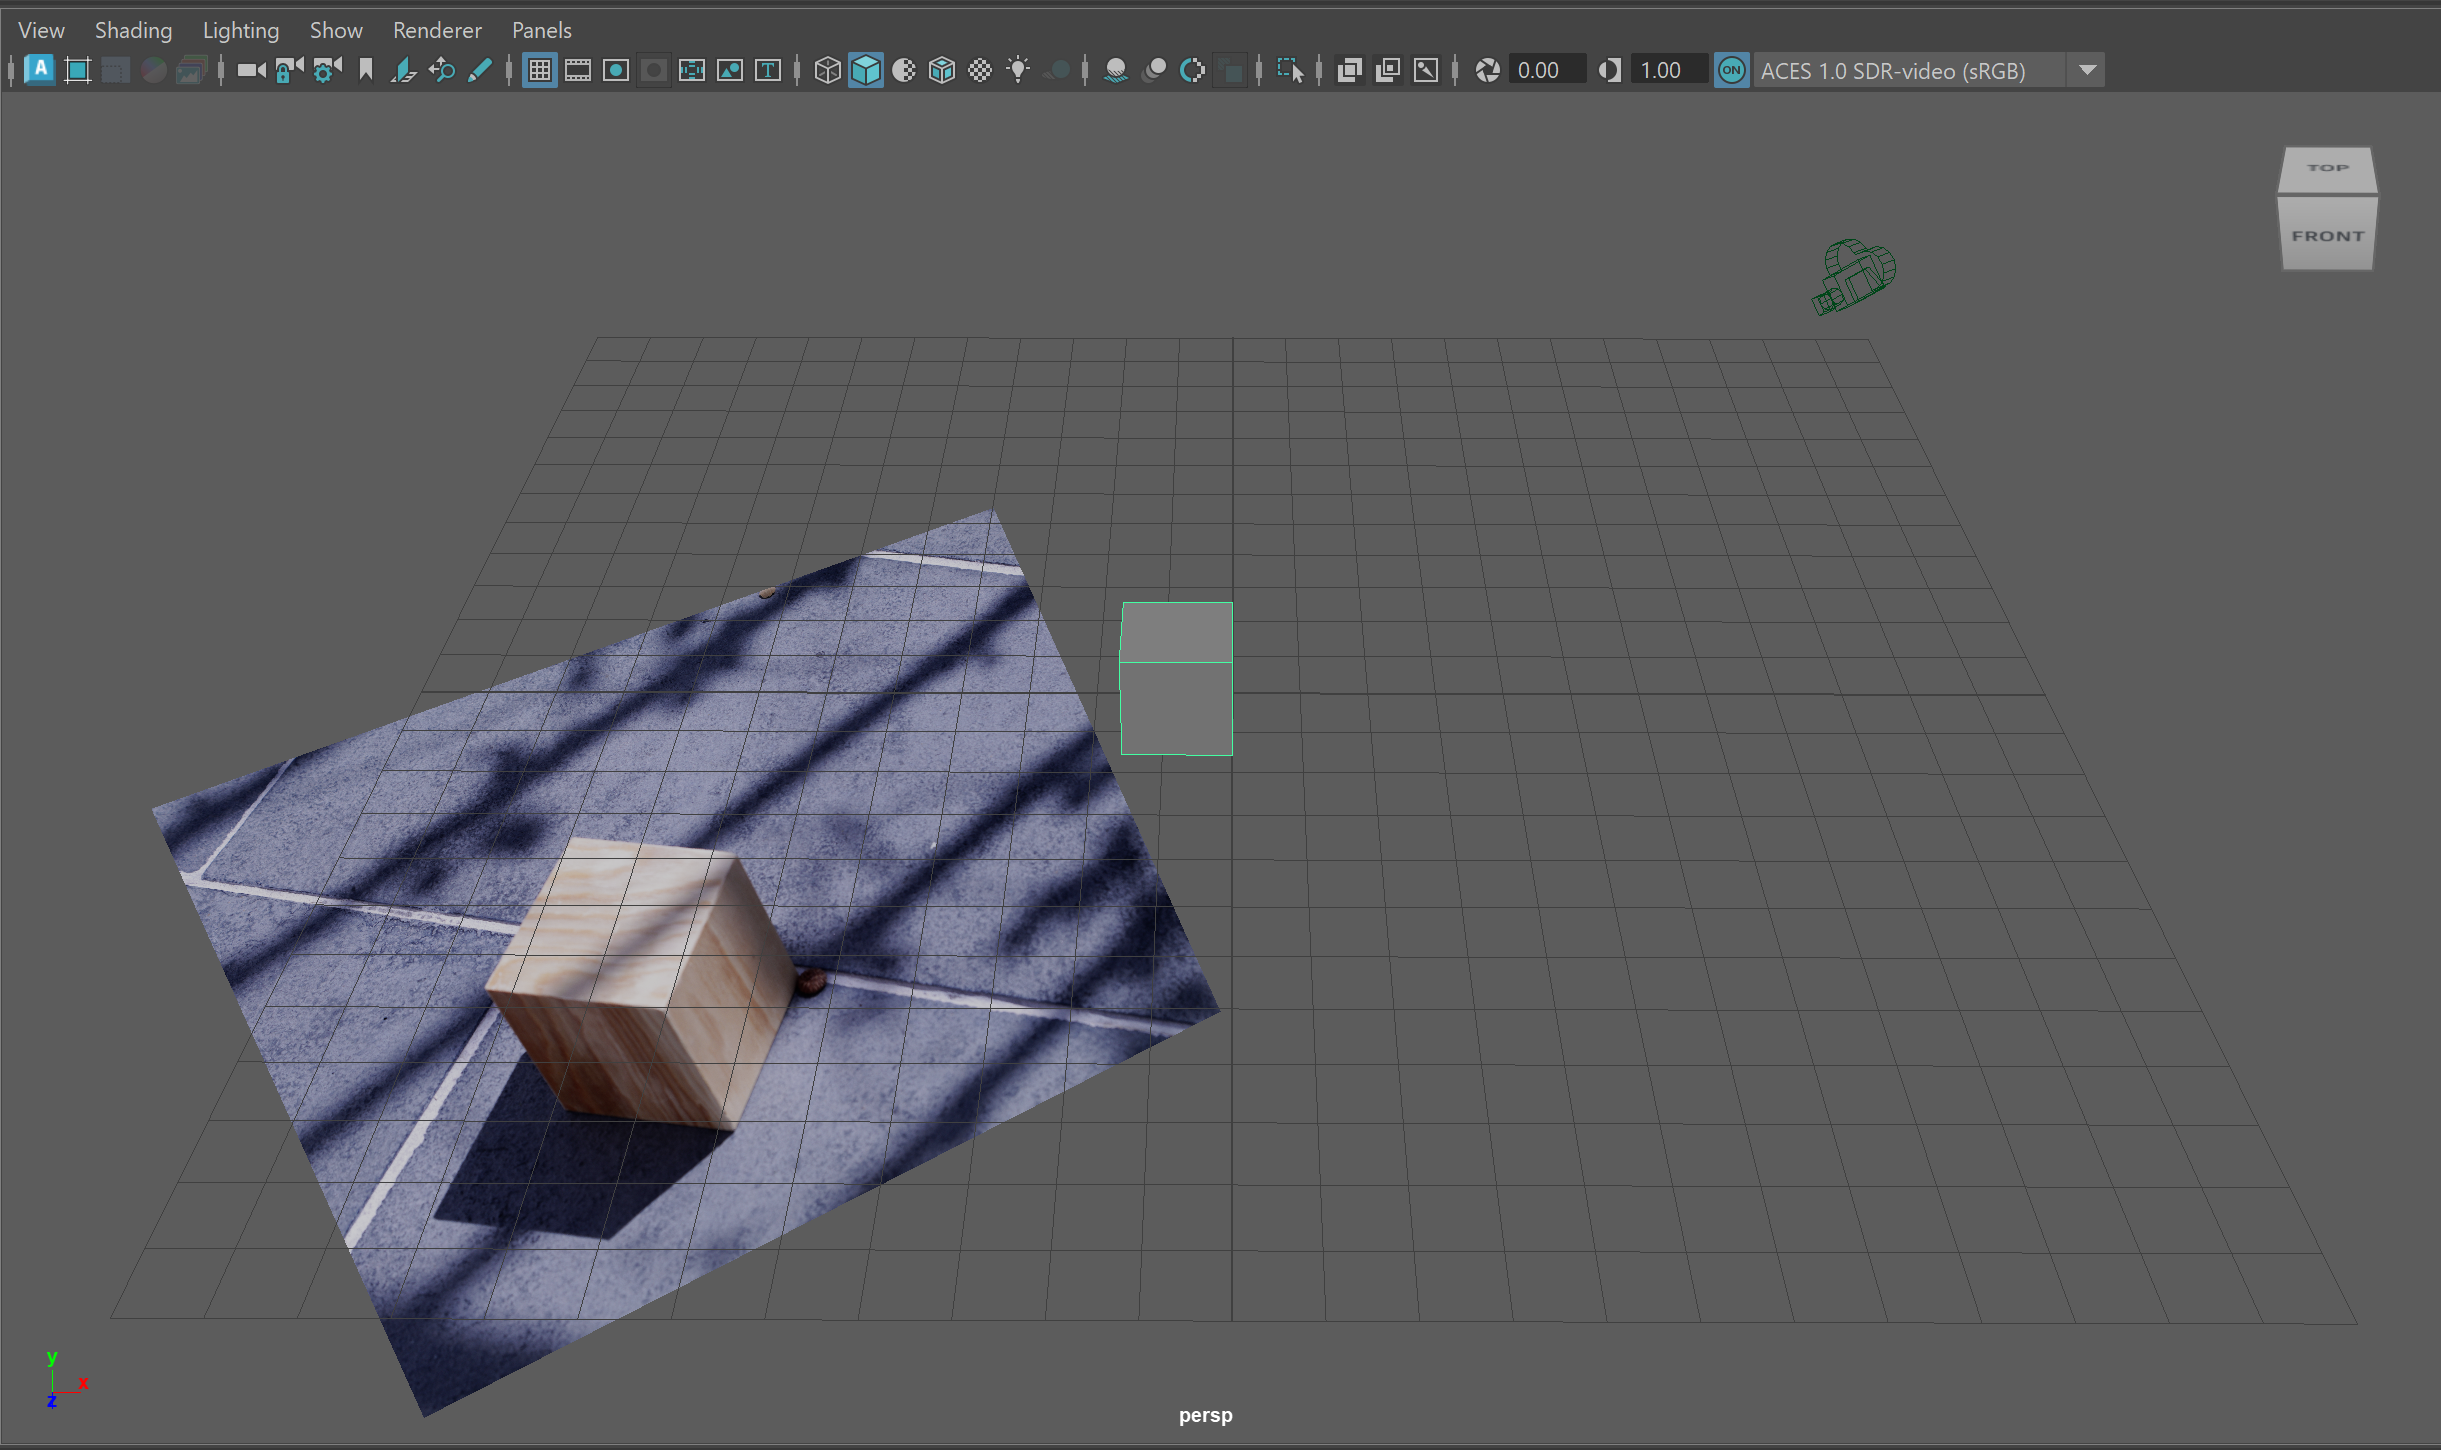
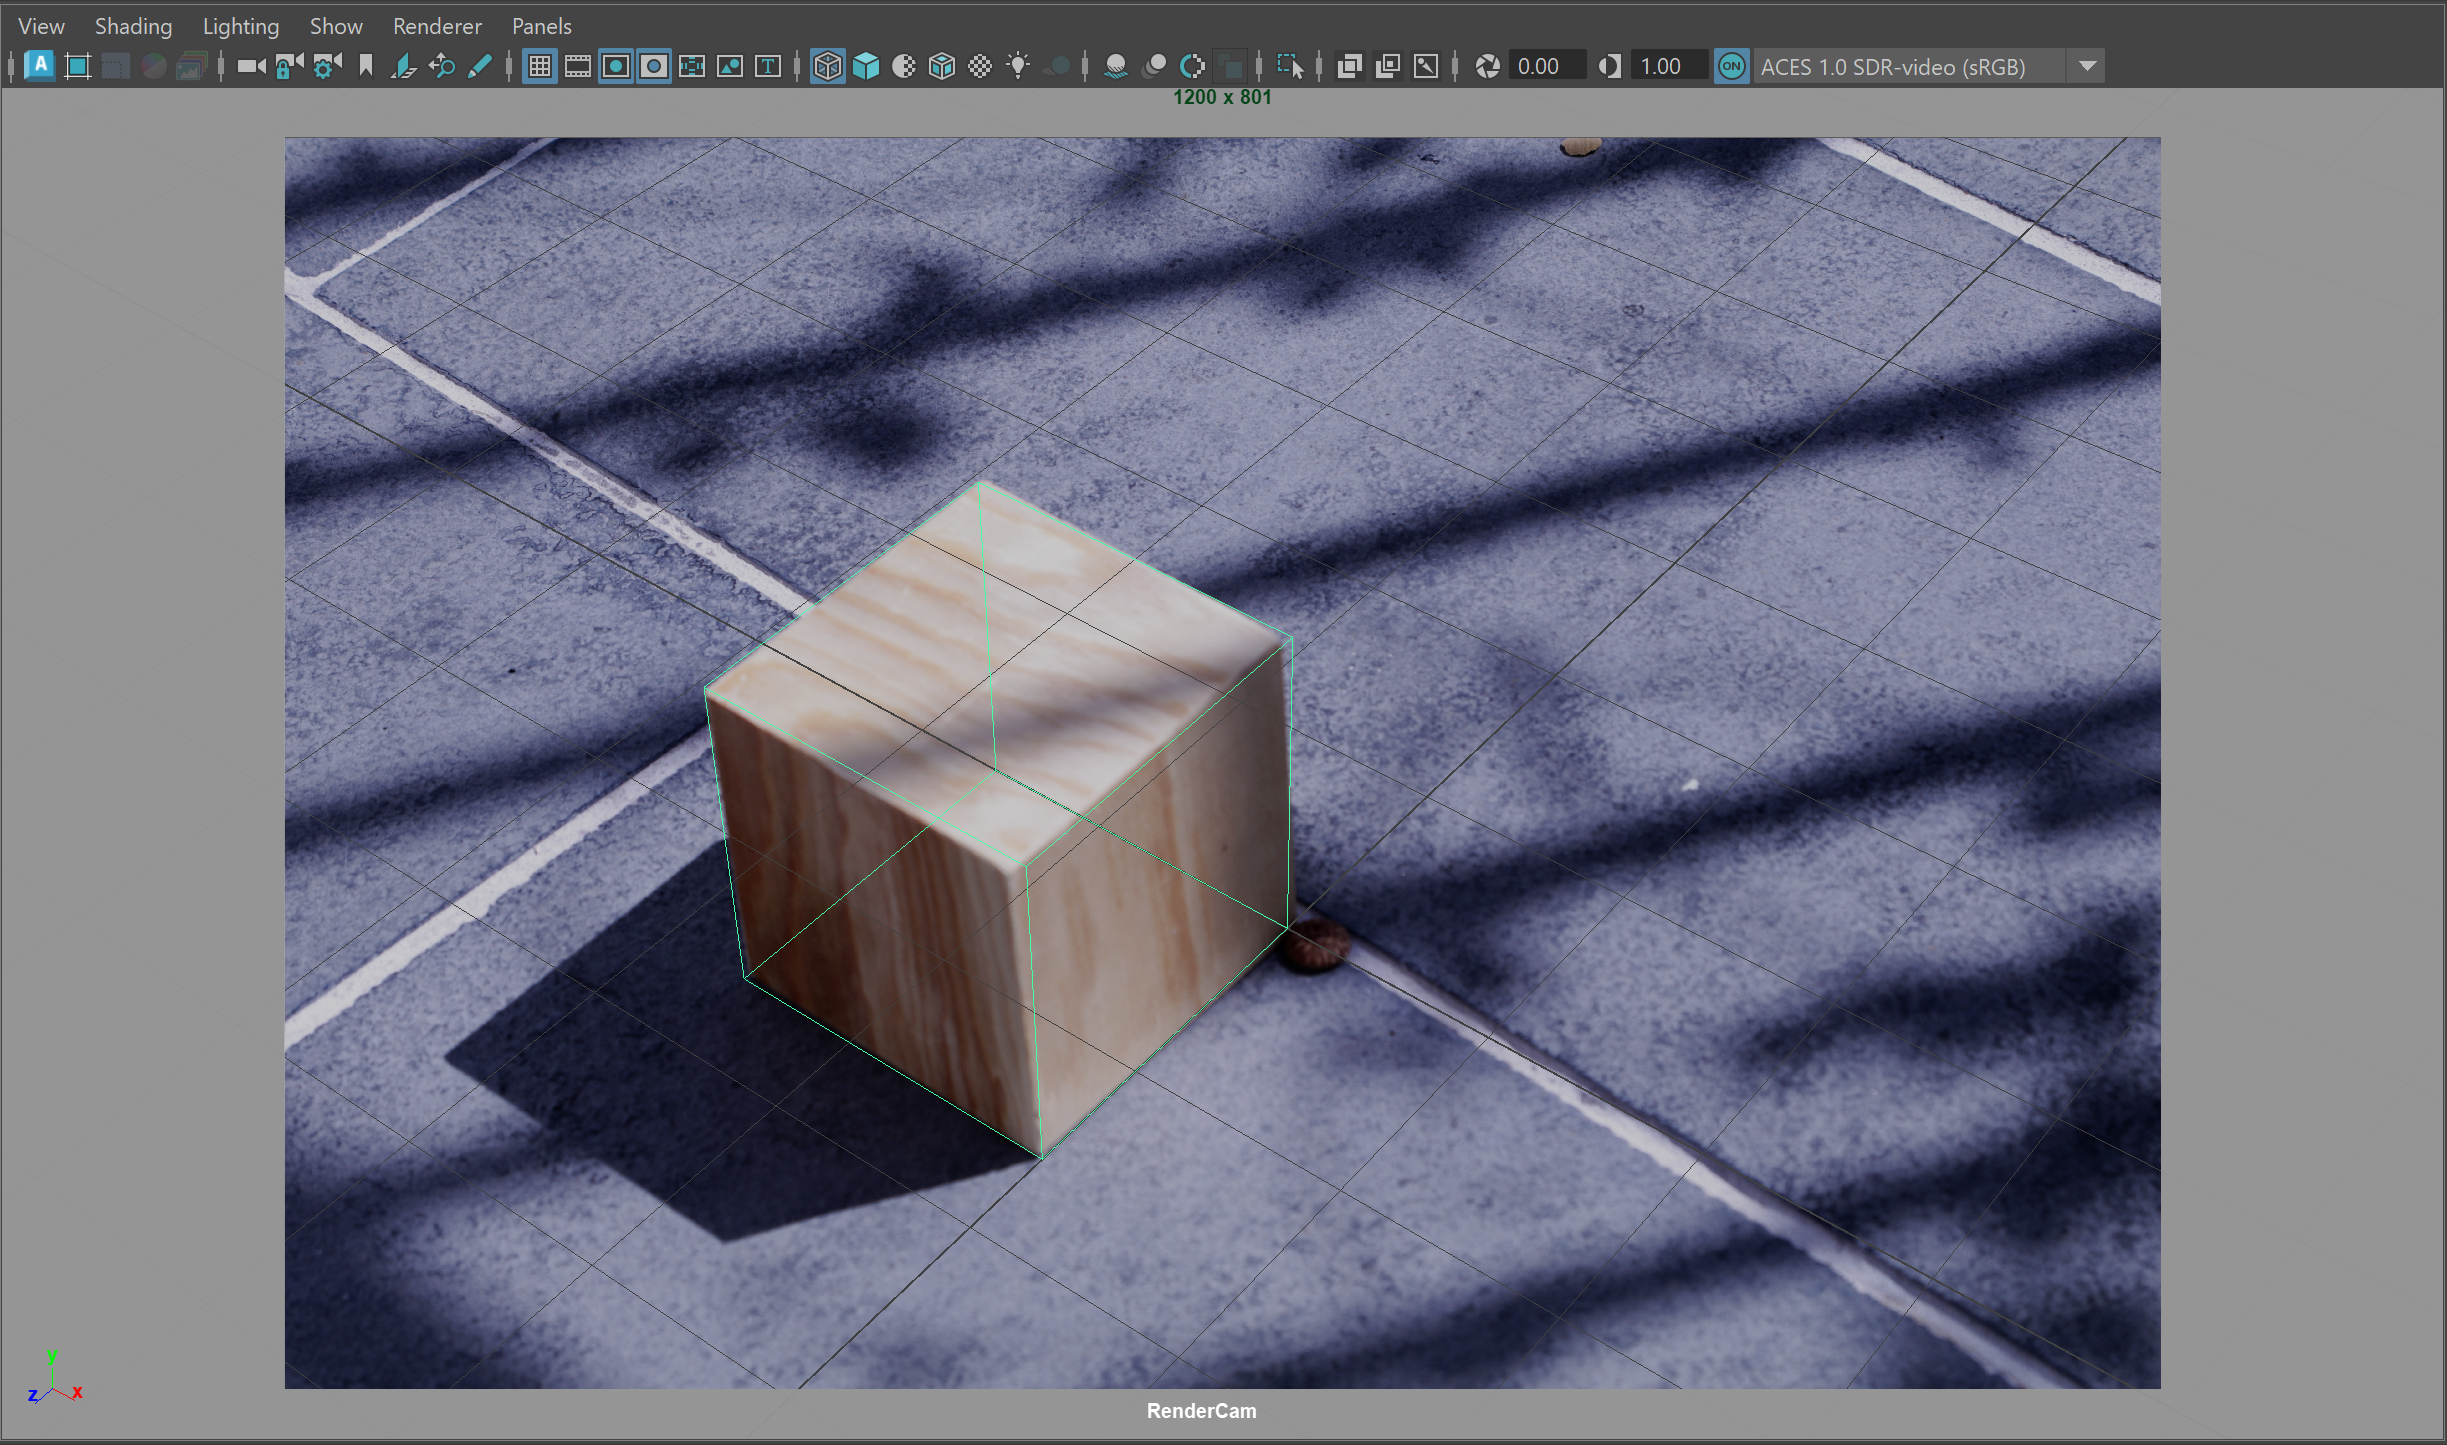
Camera Matching Attempt
I have set up my Maya scene for camera matching, using a cube and the image plane projected from the camera. I am using the focal length from the photo’s metadata (65mm). So far, I have gotten the CG cube as aligned as I could with the wooden cube, but there are still corners that are off. I might have to slightly adjust the focal length or another camera setting.